27 Ingenious Ideas for Maximizing Space in Your Small L-Shaped Kitchen
In the world of contemporary living, small kitchens have become a common reality, especially for those living in urban settings. While it may seem challenging to create a functional and stylish cooking space within an L-shaped layout, there’s no need to feel limited by square footage. In this listicle, we present 27 ingenious ideas designed to help you maximize every inch of your small kitchen—transforming it into an efficient and inviting hub for culinary creativity. From clever storage solutions to innovative layout tips, you’ll discover a treasure trove of practical strategies that cater to both utility and aesthetics.By the end,you’ll be inspired to reimagine your space and harness the full potential of your L-shaped kitchen.Get ready to embrace a world of possibilities!
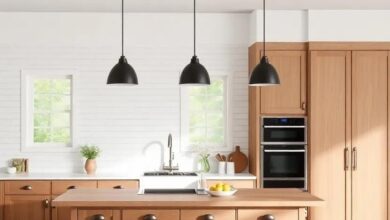
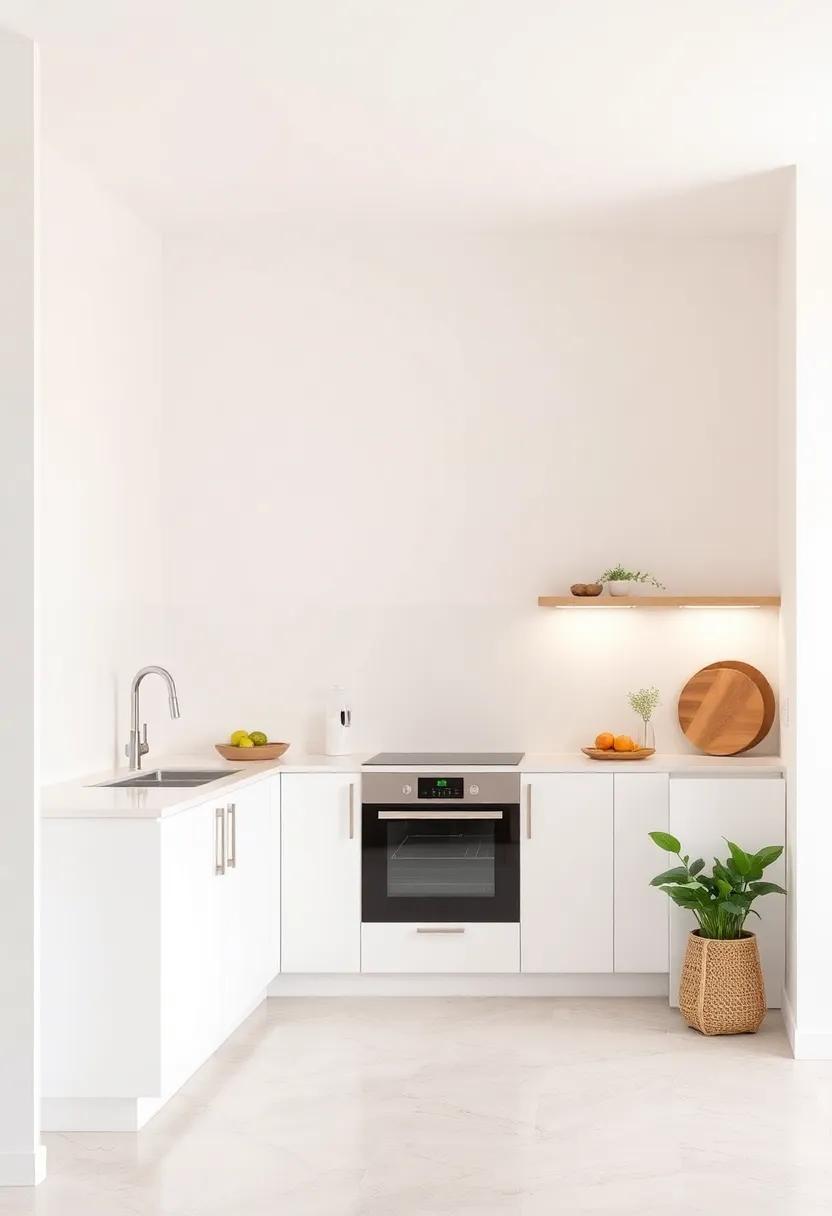
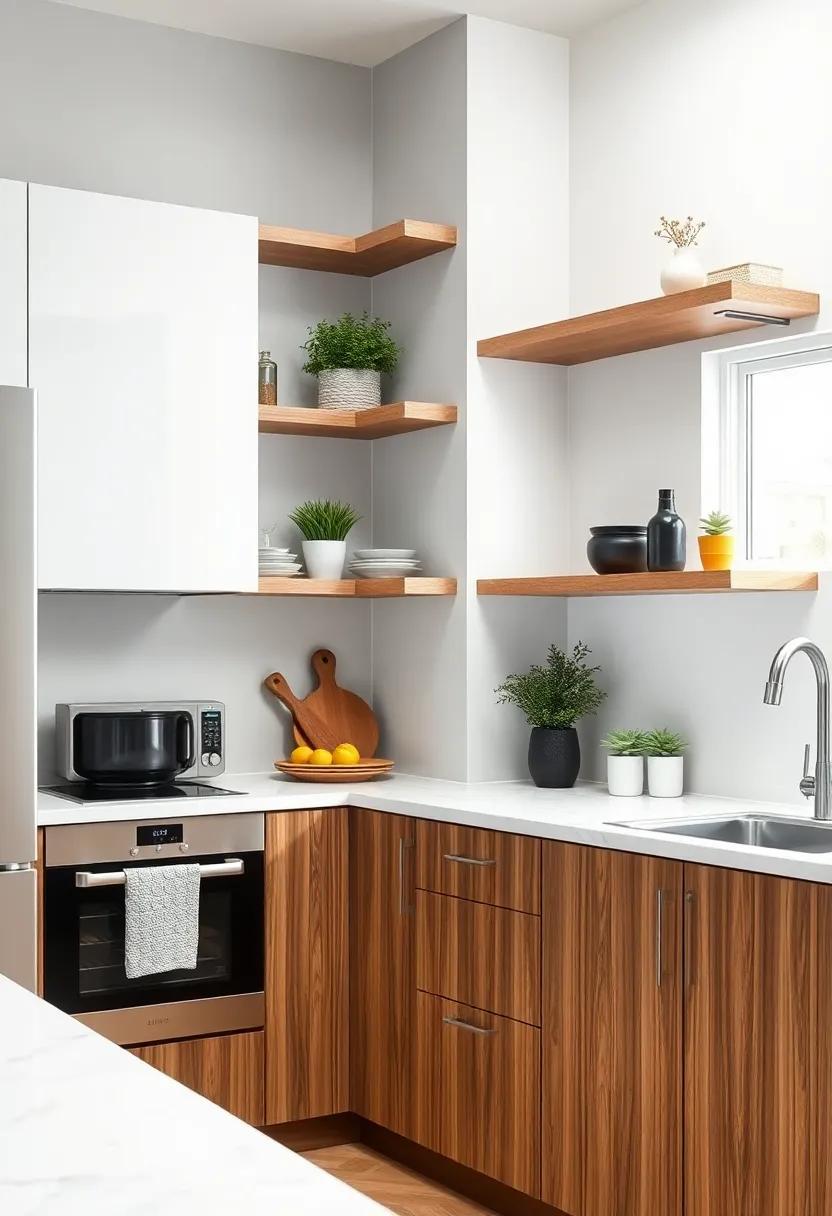
Utilize Vertical Space: Install wall-mounted shelves or cabinets to keep your countertop clear and increase storage
In small L-shaped kitchens, vertical space frequently enough remains untapped, but it can be your best ally in achieving a clutter-free environment. Wall-mounted shelves offer a stylish and functional solution, enabling you to display your favorite cookbooks, decorative jars, and everyday essentials without consuming valuable countertop space. When arranging your shelves, consider staggering them at different heights for a dynamic look, and combining open shelves with baskets for hidden storage. This approach not only enhances accessibility but also adds visual interest, turning your kitchen walls into a showcase.
For a more polished appearance, install wall-mounted cabinets to conceal kitchenware and maintain a streamlined aesthetic. These cabinets can be customized to fit your style,whether you opt for a sleek modern finish or a rustic farmhouse vibe. To further maximize your space, integrate features such as pull-out racks or glass-front doors that allow you to display your favorite dishware without compromising on organization.Pairing wall-mounted cabinets with creative lighting solutions can illuminate your culinary space, making it feel larger and more welcoming while serving as additional functional storage.
Magnetic Spice Rack: Use magnetic containers to hold spices on the side of your refrigerator, freeing up drawer and shelf space
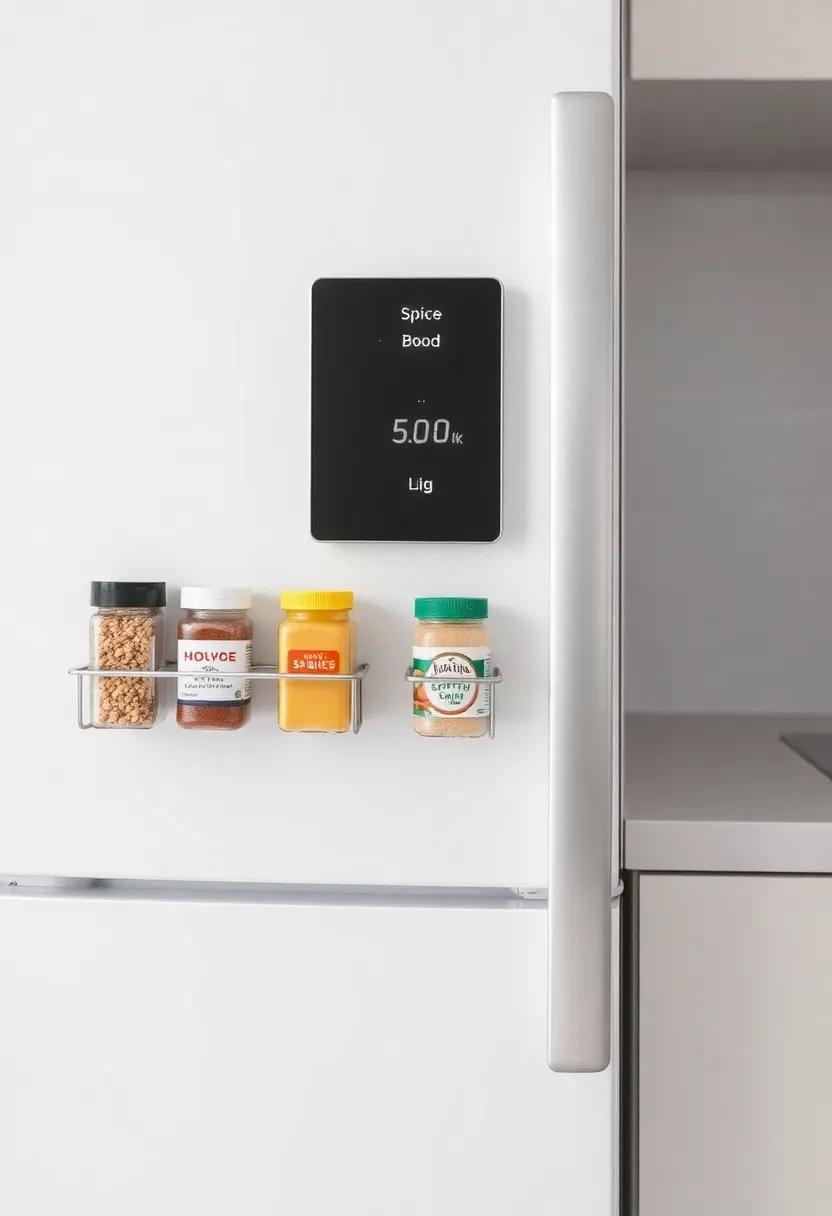
Transform the often-overlooked vertical space of your kitchen with a magnetic spice rack that attaches directly to the side of your refrigerator. By using magnetic containers, you can create an attractive display of your favorite spices while keeping them easily accessible. This not only enhances your kitchen’s aesthetic but also frees up valuable drawer and shelf space. Choose sleek,uniform containers for a streamlined look,or mix and match colorful jars for a pop of personality.
To set up your magnetic spice system, consider the following tips:
- Select strong magnets that can hold heavier spices without falling or being knocked off.
- Label each container clearly to avoid confusion when you’re in the middle of cooking.
- Organize by frequency of use; keep your go-to spices at eye level for easy access.
For a quick reference, check out the table below for ideas on the types of spices that work well in magnetic containers:
| Spice | Container Size | Frequency of Use |
|---|---|---|
| Salt | Medium | Daily |
| Pepper | Medium | Daily |
| oregano | Small | Weekly |
| Cumin | Small | Weekly |
| Cinnamon | Small | Occasional |
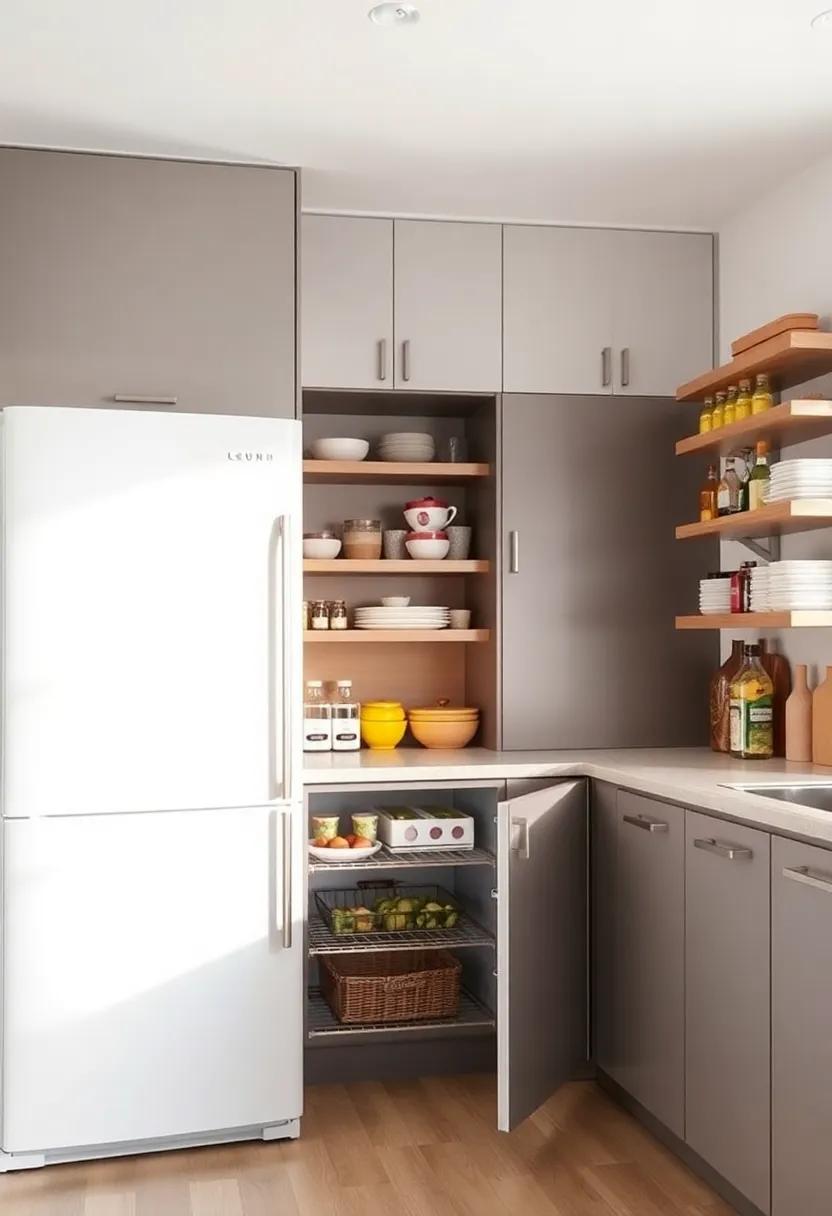
Pull-Out Pantry: Incorporate a slim pull-out pantry between cabinets to store dry goods and canned items efficiently
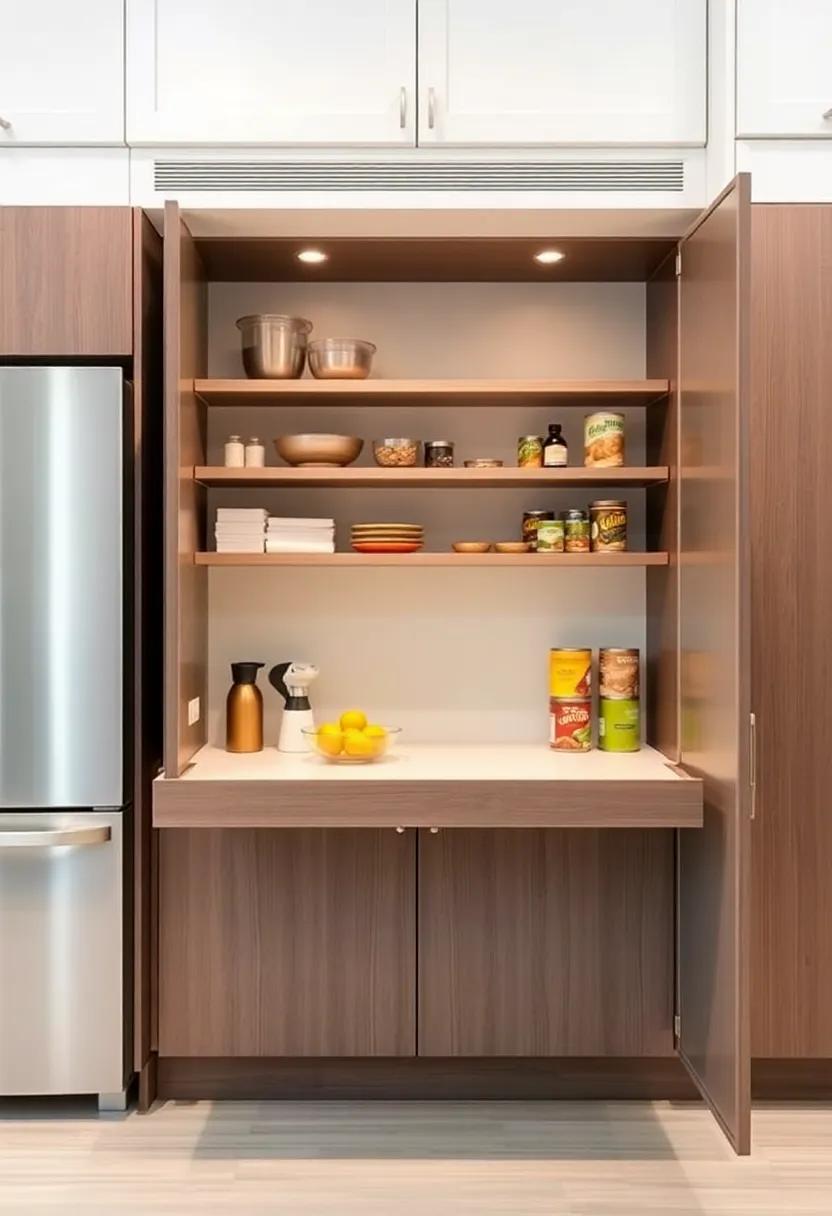
In small L-shaped kitchens, space is frequently enough at a premium, making innovative storage solutions essential. One such solution is the incorporation of a slim pull-out pantry nestled between cabinets. This clever design not only utilizes narrow gaps but also transforms them into functional storage that keeps your dry goods and canned items easily accessible yet out of sight. Imagine having a designated spot for essential ingredients like pasta, rice, and spices, all organized and ready to use at a moment’s notice.
To maximize the efficiency of your pull-out pantry, consider these smart organization tips:
- Clear Containers: Use obvious bins to easily identify contents.
- Labeling: Adorn each shelf with labels for quick reference.
- Tiered Shelves: Implement tiered shelves to optimize vertical space.
- Slide-Out Baskets: Equip your pantry with slide-out baskets for easier access to smaller items.
Here’s a quick comparison of popular pull-out pantry sizes and their storage capacities:
| Width | Depth | Storage Capacity |
|---|---|---|
| 6 inches | 24 inches | Up to 12 cans |
| 12 inches | 24 inches | Up to 24 cans |
| 15 inches | 24 inches | Up to 30 cans |
Corner Shelving: Use corner shelves to make the most out of underutilized corner areas for both storage and decorative purposes
Transform those neglected corners of your kitchen into functional and stylish displays with the addition of corner shelving. These versatile shelves not only create additional storage space but also serve as a canvas for your favorite décor.Consider utilizing them in the following ways:
- Herbs and Spices: Install small pots or trendy jars to house your herbs and spices. This not only makes them easily accessible but adds a touch of green to your kitchen.
- Kitchenware Display: Use corner shelves to showcase elegant dishes, colorful mugs, or decorative bowls.This enables you to blend functionality with aesthetics.
- Cookbooks: Stack up your favorite cookbooks, making meal prep a bit more inspiring. A curated collection can also serve as an art piece in the corner.
- Artistic Arrangements: Add personal touches with framed photos or artwork, creating a cozy, inviting atmosphere in your cooking space.
To maximize the potential of corner shelving, think vertically by layering your items in a staggered format. This not only optimizes space but also enhances visual interest. Consider using various shelf styles—like floating or tiered structures—to create a more dynamic look. Here’s a simple table highlighting different shelving styles and their benefits:
| Style | Benefits |
|---|---|
| floating Shelves | Minimalist design that saves floor space |
| Tiered Shelves | Multi-level storage for maximum visibility |
| corner Units | Designed specifically for corner use, maximizing every inch |
Folding Table: A wall-mounted folding table can serve as extra prep space or a dining area when needed without occupying precious floor space
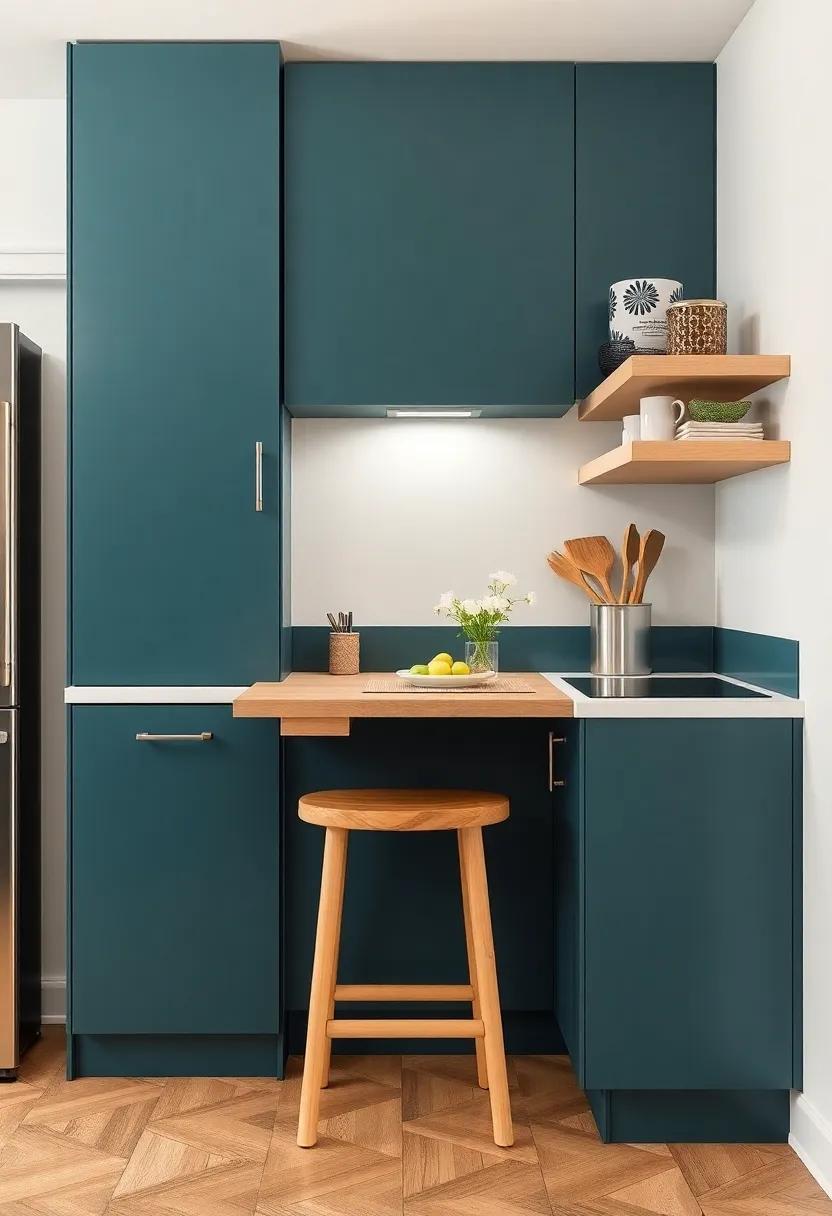
Imagine transforming an unused wall into a multifunctional space saver with a wall-mounted folding table. This clever addition instantly elevates your kitchen’s utility by providing a versatile area for various activities. Whether you need additional prep space for cooking, a cozy dining nook for two, or even a spot to enjoy your morning coffee, this table adapts to your needs while seamlessly folding away when not in use. Gone are the days of cluttered countertops! You can relish in the extra workspace without the hassle of bulky furniture.
Installing a folding table is not only practical, but it also adds an aesthetic touch to your small L-shaped kitchen. You can easily customize the table to match your decor, whether you prefer a sleek modern look or a rustic charm. Consider these ideas to maximize its functionality:
- Combine with wall shelves: Add decorative elements or cookbooks to create an inviting atmosphere.
- Incorporate space for stools or chairs: Ensure they can nest under the table to maintain an open floor plan.
- Utilize hooks or magnets: Hang kitchen utensils or décor on the wall nearby for easy access.
- Opt for a drop-leaf design: This allows even more adaptability, extending your surface area only when necessary.
Over-the-Door Hooks: Hang pots,pans,or utensils on the back of the kitchen door with over-the-door hooks for easy access and added storage
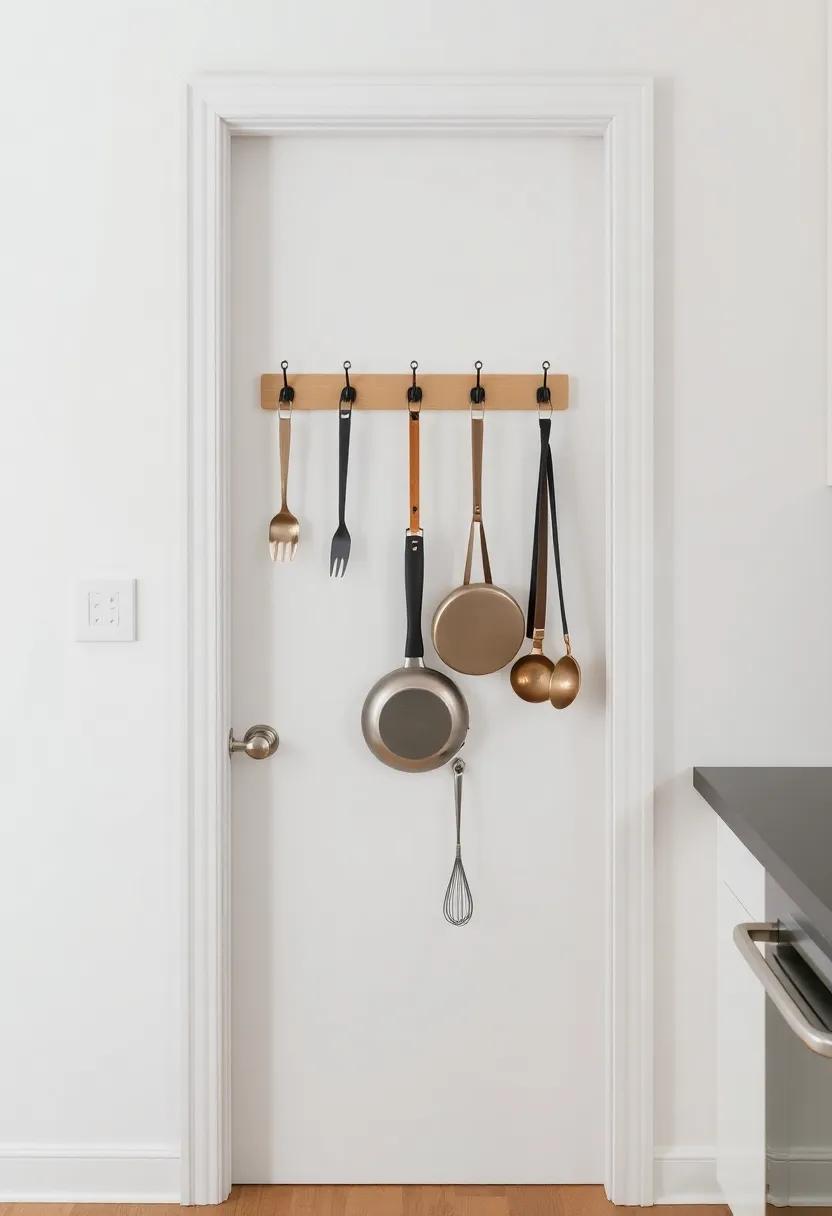
If your kitchen lacks cabinet space but needs a solution for storing all those pots, pans, and utensils, consider installing over-the-door hooks. These versatile hooks transform the frequently enough-neglected area behind your kitchen door into a functional storage haven. They’re perfect for hanging lightweight items that you use frequently, keeping your most essential tools within arm’s reach while also freeing up precious counter and cabinet space. Imagine the convenience of having your favorite pots or cooking utensils ready at a moment’s notice, all while adding an element of flair to your kitchen décor!
There are various styles and sizes of hooks available, catering to your aesthetic and storage needs. Here are some creative uses for these nifty hooks:
- Seasonal Pot Rack: Hang decorative seasonal pots that can double as eye-catching kitchen décor.
- Utensil Organizer: Keep spatulas, ladles, and whisks close to the cooking area for quick accessibility.
- Cookbook Holder: Use hooks to suspend a small basket that can hold your favorite cookbooks open at the ideal page.
When choosing over-the-door hooks, ensure they are sturdy enough for the items you plan to hang. To help you visualize, here’s a simple table of materials and their compatibility:
| Material | Weight Capacity | Ideal Use |
|---|---|---|
| Plastic | Up to 5 lbs | Utensils, Small Pots |
| Metal | Up to 15 lbs | Large Pots, Frying Pans |
| Wood | Up to 10 lbs | Decorative Hooks, Lightweight Utensils |
By integrating these hooks into your kitchen design, you not only enhance your organization game but also bring style into a compact space. Moreover, over-the-door hooks can also be easily removed or replaced, allowing for adjustments as your kitchen needs change!
Smart Drawer Dividers: Invest in adjustable drawer dividers to keep utensils and tools organized, maximizing drawer space and efficiency
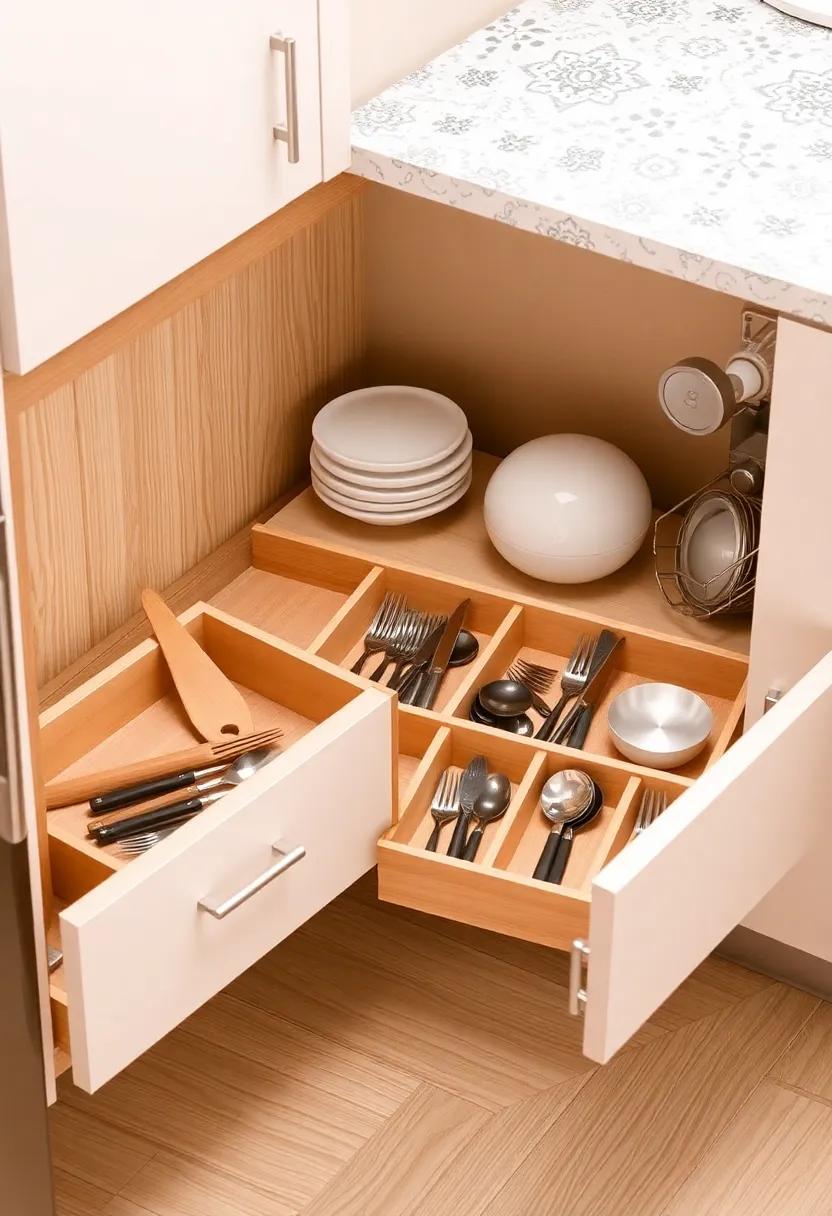
In a small L-shaped kitchen, every inch counts, and keeping your drawers organized is essential for maximizing space and efficiency. Smart drawer dividers are a game-changer, allowing you to customize your drawer layout according to your specific needs. Rather of a jumbled mess of utensils and tools, you can create individual compartments for each item, ensuring easy access and a tidy appearance. Whether it’s separating knives, spatulas, or measuring spoons, the ability to adjust these dividers means you can adapt as your collection grows or changes over time.
By investing in these innovative organizers, you can transform chaotic drawers into streamlined spaces. Here are some practical benefits you can reap from using adjustable dividers:
- Maximized Space: Create custom sections for each utensil,utilizing every inch of drawer space effectively.
- Increased Efficiency: Quickly find what you need without digging through a cluttered drawer.
- Flexibility: Easily rearrange dividers as your kitchen tools change or as your cooking habits evolve.
- easy Maintenance: Simplifies the process of cleaning and maintaining the organization of your kitchen tools.
Under-Sink storage: utilize under-sink organizers or stackable bins to store cleaning supplies and other essentials without cluttering your kitchen
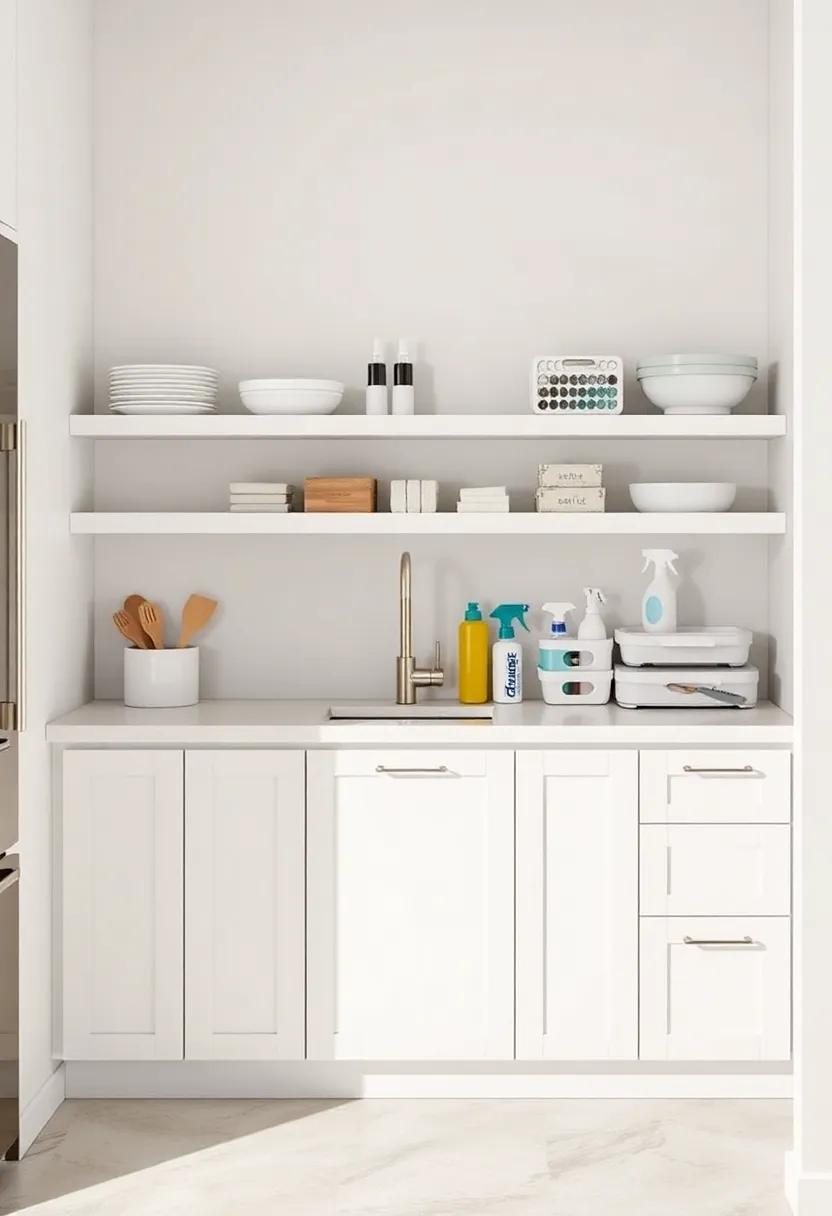
One of the most overlooked areas in a small kitchen is the under-sink space, which can quickly become a chaotic mess of cleaning supplies and miscellaneous items. to keep this space organized and functional, consider using under-sink organizers that maximize vertical space. These come in various shapes and sizes, allowing you to categorize your items efficiently. Opt for stackable bins or tiered shelves that can hold everything from sponges to dish soap, ensuring that you can see exactly what you have at a glance. Here are some ideas for what to include in your under-sink organization:
- Cleaning sprays - Group together similar products in a bin.
- Sponges and rags – Use a small basket to keep them tidy and accessible.
- Trash bags – Store in a labeled container to avoid confusion.
- Dishwashing essentials – Keep your dish soap, brushes, and gloves together.
Along with using organizers, consider incorporating a pull-out drawer or a sliding shelf if your plumbing allows for it. This clever solution can help you access items at the back without needing to maneuver around everything else.To maintain cleanliness, a simple divider can work wonders to keep your cleaning products separated from your personal items. A neat little table below can illustrate the benefits of different under-sink storage options:
| Option | Benefit |
|---|---|
| Stackable bins | Maximize vertical space and keep items visible. |
| Tiered shelves | Easy access to cleaning supplies without digging. |
| Pull-out drawers | Streamlined access to stored items, reducing clutter. |
| Transparent containers | Quick identification of contents, reducing time spent searching. |
glass Front Cabinets: Use glass-fronted cabinets to display decorative dishware while preventing the space from feeling cramped
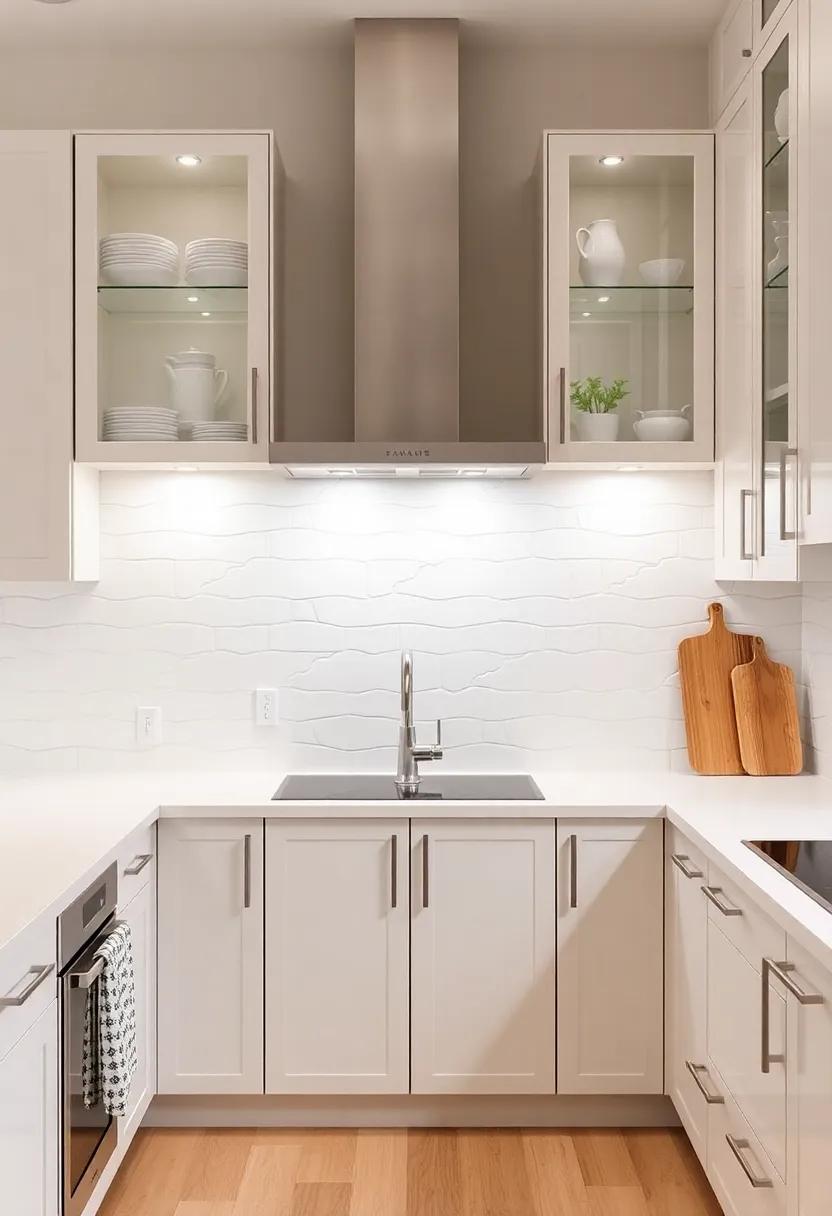
Transform your small L-shaped kitchen into a showcase of style and organization by incorporating glass-front cabinets. These cabinets not only allow you to display your favorite decorative dishware and cookbooks, but they also create an illusion of space, making the kitchen feel more open and airy. With the right lighting, glass-fronted cabinets can become a focal point, reflecting light and enhancing the overall ambiance of the room.
To maximize the visual impact, consider the following tips when styling your glass-front cabinets:
- Color Coordination: Choose dishware in complementary colors to create a cohesive look.
- Layering: Arrange items in layers,placing larger pieces at the back and smaller ones at the front for depth.
- Lighting: Install LED strip lights inside the cabinets to illuminate your display.
- Minimalist Approach: Avoid overcrowding; less is more when showcasing your prized pieces.
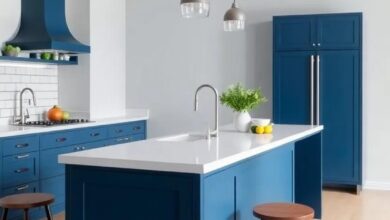
Island with Storage: If possible, add a kitchen island with built-in storage to create extra workspace and room for kitchen essentials

In a small L-shaped kitchen, maximizing workspace is essential, and an island with built-in storage can be a game-changer. Not only does it provide an extra surface for meal prepping or plating dishes,but it can also enhance the overall functionality of the kitchen. You can customize your island to include features such as pull-out drawers for utensils, a hidden trash bin, or even a dedicated section for cookbooks and recipe cards. By incorporating a seating area,it can double as a casual dining spot,seamlessly integrating into your cooking space.
When designing your island, think vertical! Utilizing the height can allow for clever storage solutions like open shelving for frequently used items or decorative accents. Consider installing hooks or magnetic strips on the sides for hanging pots, pans, or knives. Create a stylish and practical center that not only enhances your workflow but also adds personality to your kitchen with unique finishes. A well-thought-out island can make a small space feel larger and more organized.
Use a Pegboard: Install a pegboard on the wall for a customizable storage solution for tools, pots, and other kitchen equipment
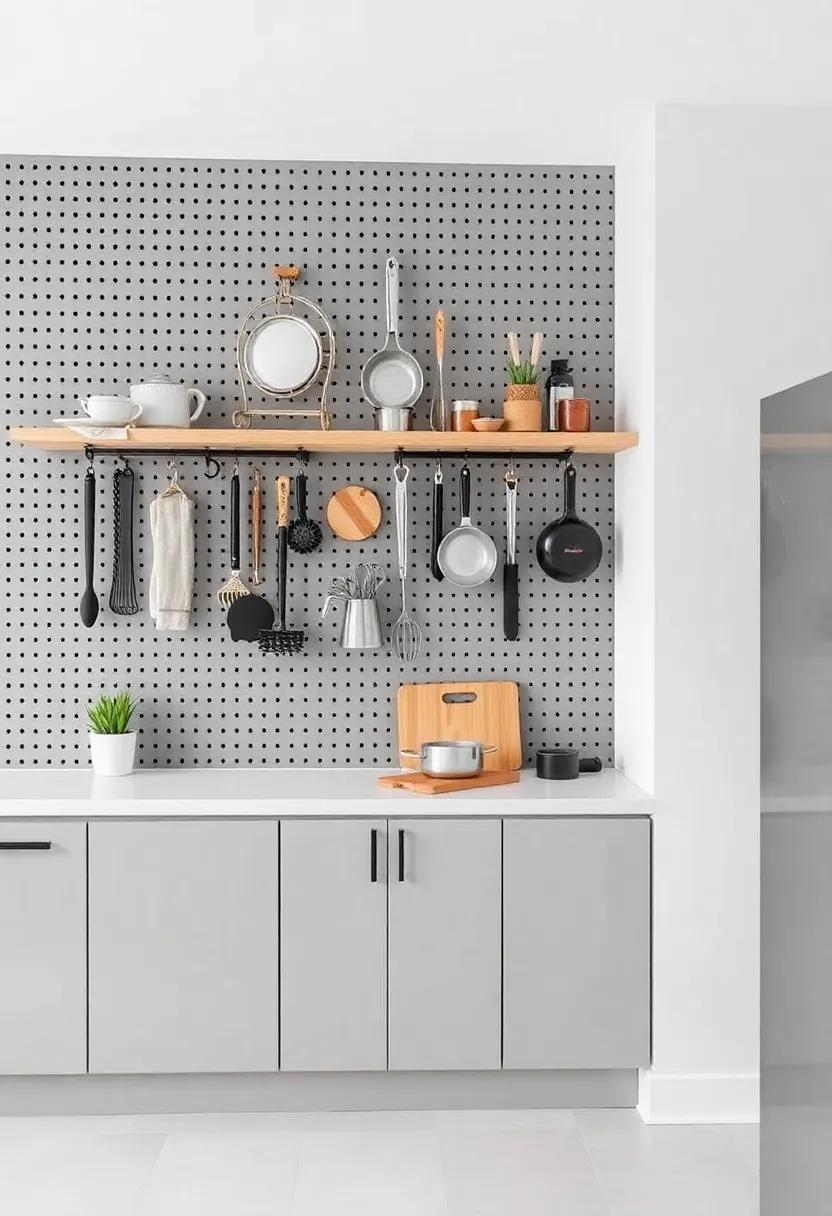
Transform your small L-shaped kitchen into an organized paradise by installing a pegboard on the wall. this versatile solution offers a way to hang all your essential tools and equipment, maximizing your available vertical space.You can customize the arrangement to suit your cooking needs and style, making it not just practical but also a decorative feature. Consider the following items to hang:
- Cooking utensils: Whisks, spatulas, and ladles can be easily accessible.
- Pots and pans: Save cabinet space by displaying your favorites on hooks.
- Cutting boards: Implement a vertical hanging system for easy reach.
- herbs and seasonings: Use small containers to keep them within arm’s length.
To elevate the aesthetic of your kitchen, you can paint the pegboard in a color that complements your existing decor. Choose from wood,metal,or even a fabric-covered board for a touch of personality. You can also create zones on the pegboard, designating specific areas for particular types of items. Here’s a simple table to help you visualize your setup:
| Zone | Items to Hang |
|---|---|
| Cooking | Utensils, pots, and pans |
| Baking | Mixing bowls, measuring cups |
| Herbs & Spices | Containers and jars |
Attractive Baskets: Use stylish baskets for produce or bread on shelves to add a decorative touch while keeping them accessible
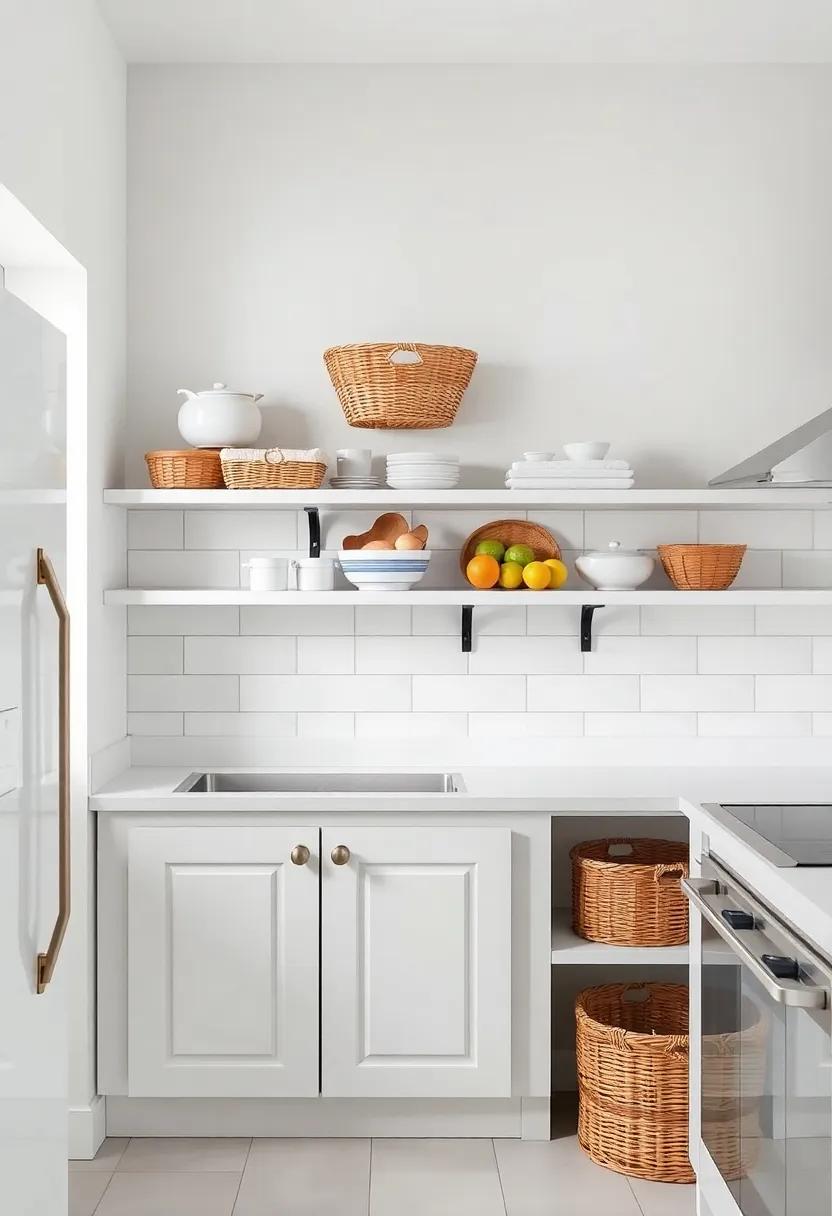
One of the simplest yet most effective ways to enhance the aesthetic of your small L-shaped kitchen is by incorporating stylish baskets for storing produce or bread. Not only do they provide a charming rustic touch, but they also keep your essentials within easy reach. Different types of baskets can complement various decor styles, from farmhouse chic to modern minimalism, adding character to your space while maintaining functionality.
Consider grouping your baskets on open shelves or countertops to create an inviting display. You can opt for a variety of materials—such as woven wicker, metal, or wood—to add texture and interest. Here are a few ways to use baskets creatively:
- Layered Storage: Stack smaller baskets inside larger ones to save space while creating an eye-catching tiered look.
- Labeling: Use decorative labels on the baskets so that each family member knows where to find snacks, fruits, or baking needs.
- Hanging Baskets: If you have ceiling space, you can install hooks to suspend baskets, which not only adds dimension but also keeps counters clear.
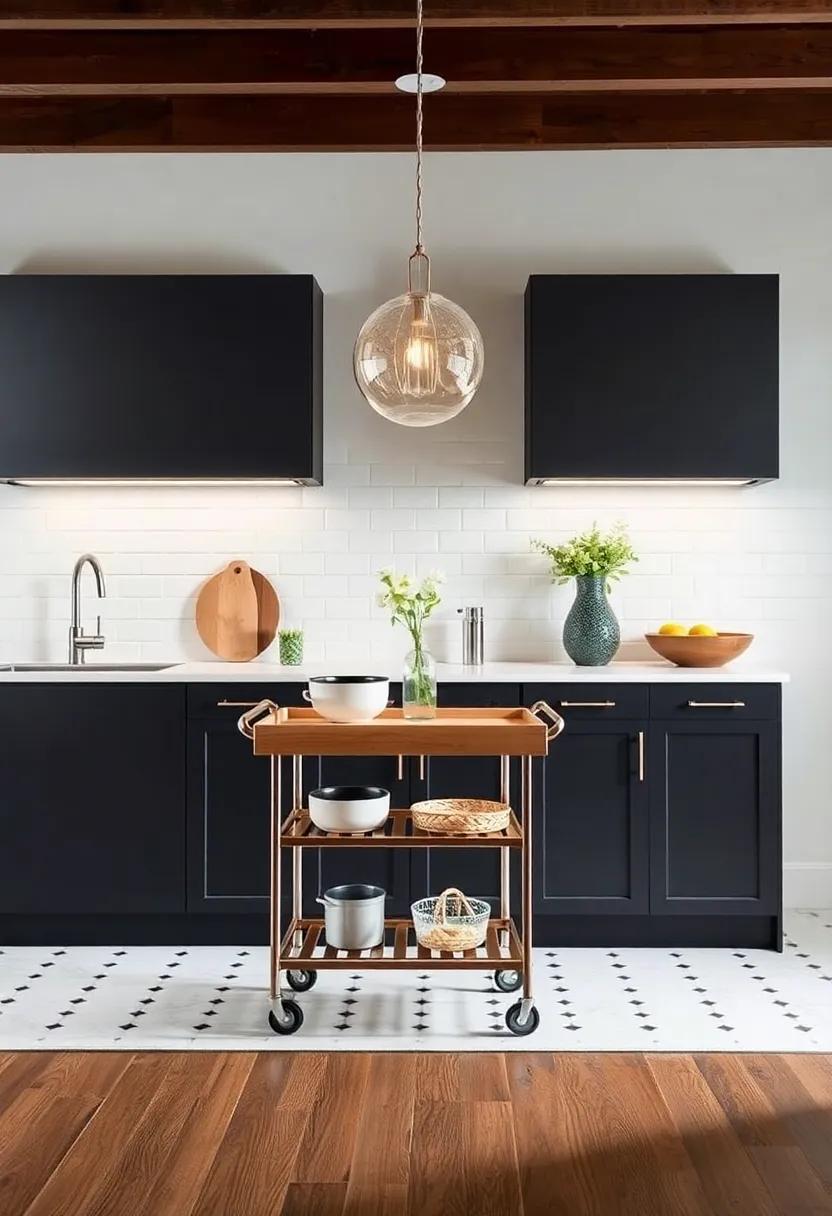
Multi-Functional Furniture: Opt for furniture pieces that can serve multiple purposes, such as a kitchen cart that can function as a prep station and storage
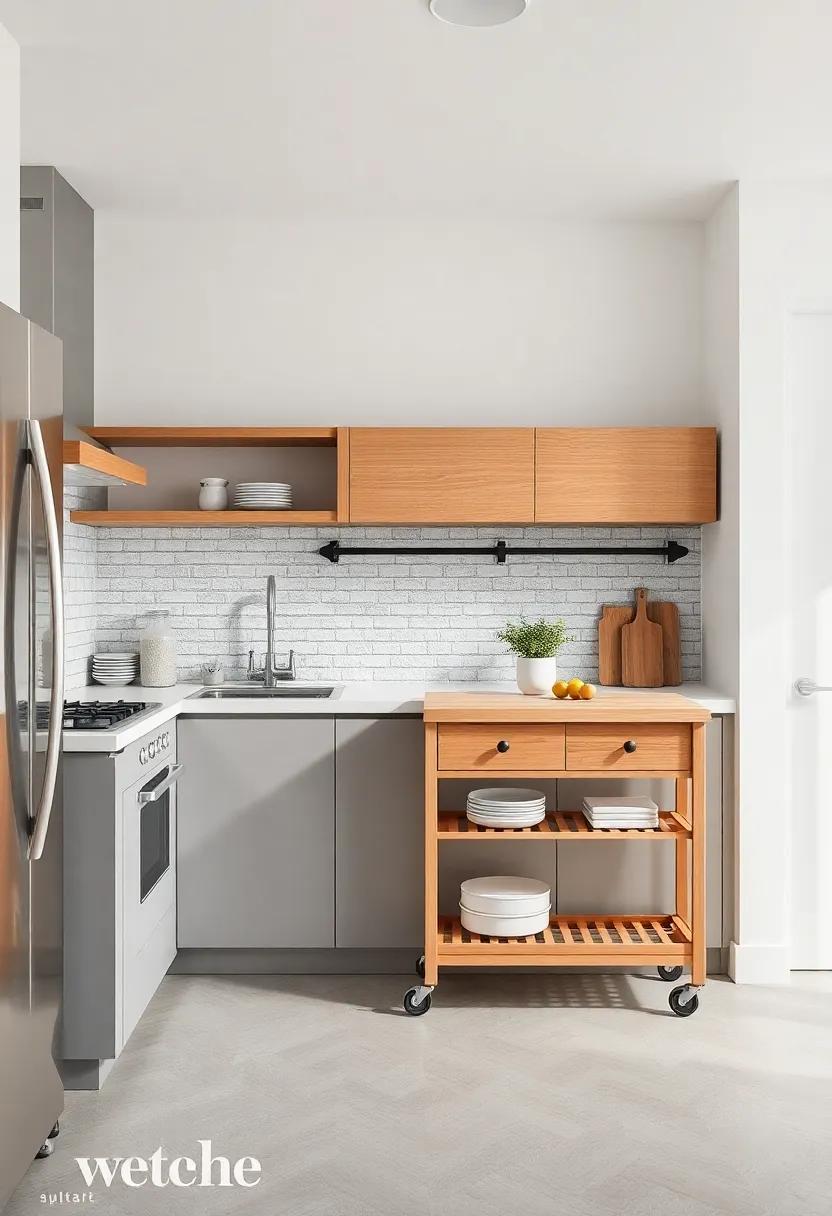
When dealing with a compact L-shaped kitchen, every inch counts, which is why choosing furniture that can tackle multiple tasks is a game changer. Consider a kitchen cart that easily transforms from a casual prep station to a storage powerhouse. This flexible piece can be wheeled around as needed, providing additional space for chopping, mixing, or simply holding ingredients. When entertaining or cooking, you can use it to display dishes, and once the cooking is done, it can be tucked away against the wall to free up precious floor space.
Additionally, look for foldable tables that can be expanded for meals and collapsed when not in use. This adaptability is ideal for small kitchens where space is at a premium. Here are some features to consider for these versatile furniture pieces:
| Feature | Benefit |
|---|---|
| Storage Shelves | Keep cooking essentials organized |
| Wheels | Easy mobility for multi-use |
| Foldability | Saves space when not in use |
| Multi-Tier Surface | Allows simultaneous prep and cooking |
Incorporating these multi-functional items will not only streamline your kitchen activities but will also enhance overall efficiency. Opt for designs that complement your existing décor, ensuring your kitchen remains cohesive while maximizing space. Each piece becomes an integral part of your culinary craft, transforming your small kitchen into a highly functional and stylish environment.
Wall-Mounted Pot Rack: Save cabinet space by hanging pots and pans from a ceiling-mounted or wall-mounted pot rack

transform your kitchen into a culinary haven with a dedicated pot rack that not only adds style but also saves precious cabinet space. Hanging pots and pans from a sleek ceiling-mounted or wall-mounted rack brings a rustic charm into your kitchen while allowing you to keep your cookware within easy reach.this arrangement minimizes the chances of rummaging through cluttered cabinets and lets you display stunning cookware as part of your kitchen decor. Consider a rack made from materials like wrought iron or stainless steel to match your kitchen’s aesthetic, ensuring that functionality and design go hand in hand.
to make the most out of your wall-mounted pot rack, think strategically about the layout. Installing hooks in varying heights can accommodate larger pots at the bottom and smaller pans at the top, maximizing vertical space. Additionally, incorporating a couple of shelves above the rack can serve as a space for spices, cookbooks, and other kitchen essentials, further enhancing storage without sacrificing accessibility. Here’s a handy table that highlights different types of pot racks you might consider:
| Type | Features | Best For |
|---|---|---|
| Wall-Mounted | Space-saving, easy access, stylish | Small kitchens with minimal floor space |
| Ceiling-Mounted | Maximizes ceiling height, can hold more pots | Kitchens with higher ceilings |
| Adjustable | Flexible height options, customizable | Variable kitchen setups |
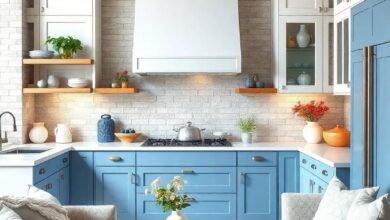
Nook Seating: Create a cozy seating area in your L-shaped kitchen using built-in benches or small stools against the wall
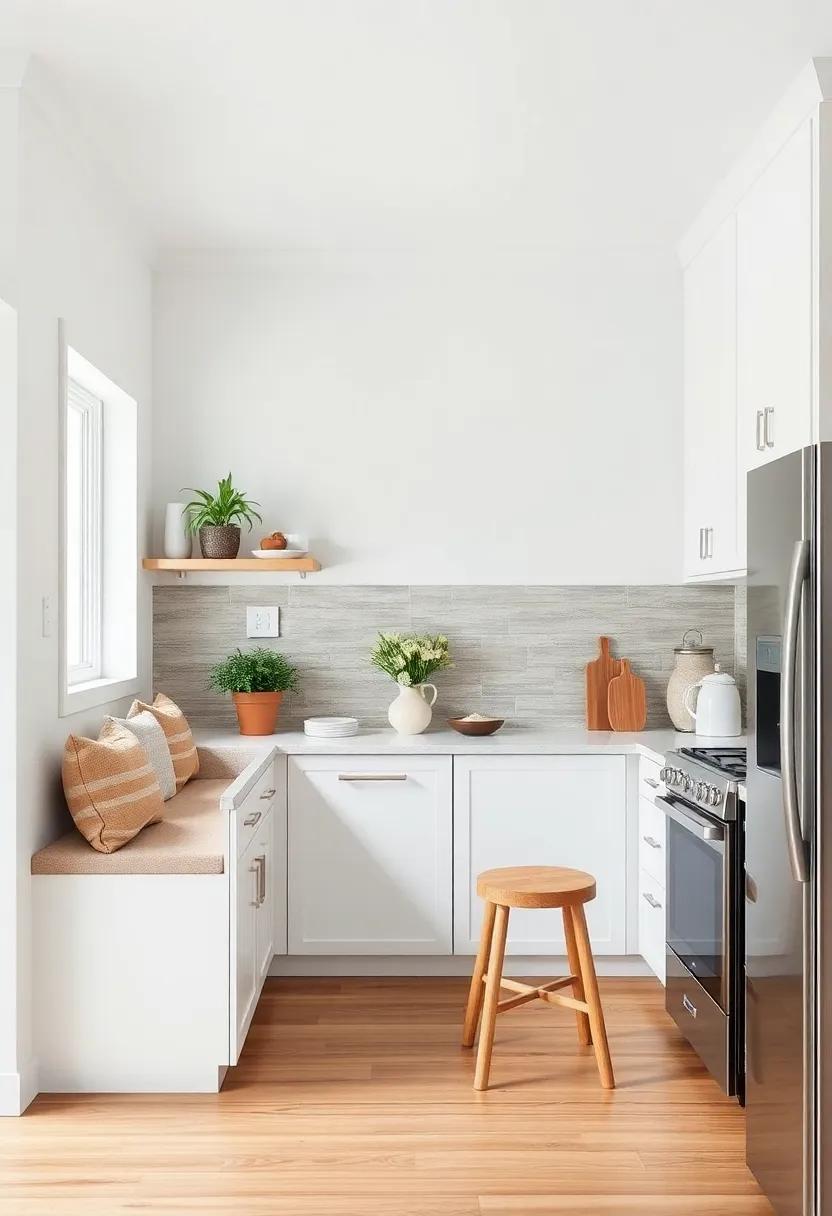
Transform the corner of your L-shaped kitchen into a cozy nook by incorporating built-in benches or small stools against the wall.This setup not only utilizes an often-overlooked space but also creates a charming gathering area where family and friends can enjoy casual meals or morning coffee. Consider adding cushions and a small table to enhance comfort and functionality. Choose materials that complement your kitchen’s decor, whether it’s rustic wood for a farmhouse vibe or sleek metal for a modern look.
To maximize the nook’s appeal, think about stylish storage solutions built into the bench design. As a notable example, a bench with drawers or lift-up seats can definitely help keep dining essentials at hand while maintaining a tidy appearance. Here are some ideas to enhance your nook:
- Mood Lighting: Incorporate pendant lights or wall sconces to create a warm ambiance.
- Decorative Accents: Use vibrant cushions and throws to add personality.
- Functional Features: Include hooks for aprons or bags to keep the space organized.
- Personal Touch: Decorate with small art pieces or photos to make the nook feel inviting.
Closet Conversion: If there’s a nearby closet, consider converting it into a pantry, free up kitchen space and keep everything organized
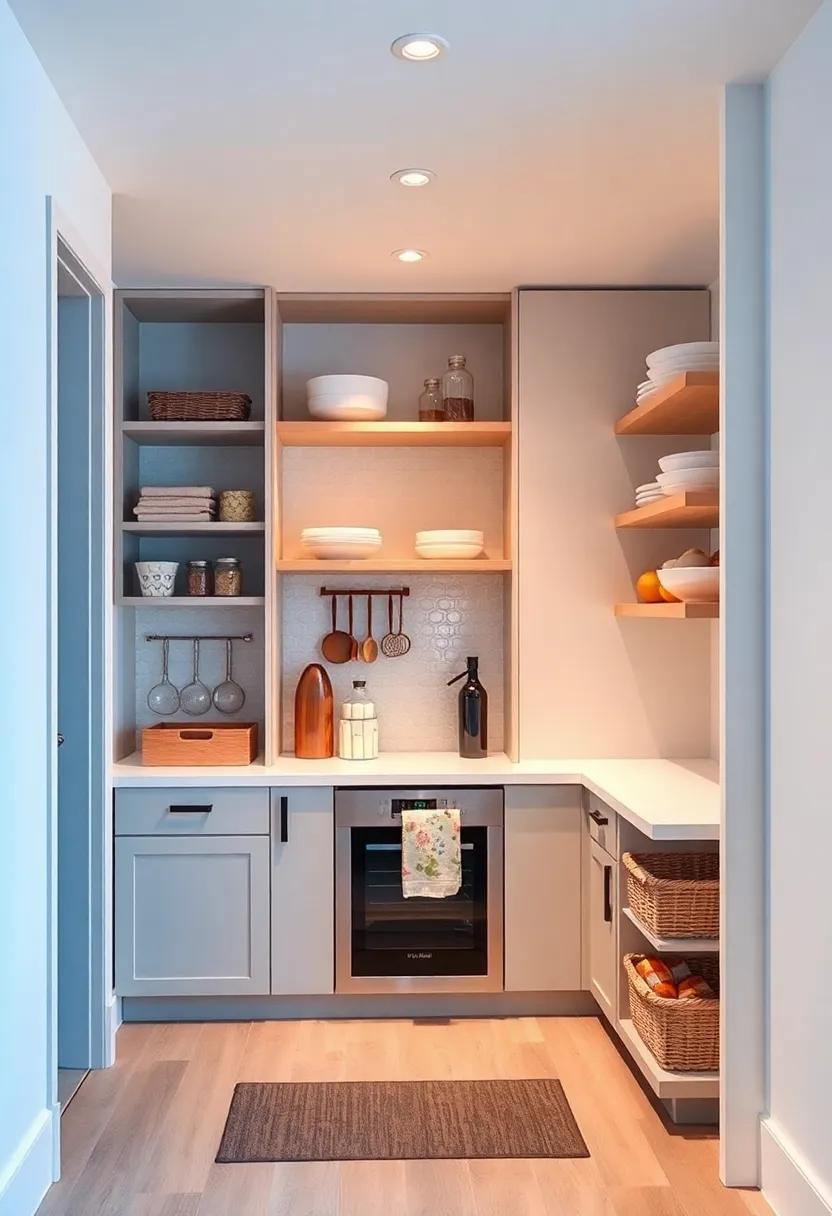
Transforming an underutilized closet into a functional pantry can be a game-changer for your kitchen. Imagine reclaiming precious counter and cabinet space, allowing for improved organization and accessibility. By clearing out the closet, you can create an inviting area dedicated to food storage, complete with shelves for canned goods, a designated spot for small appliances, and even a pull-out drawer for easy access to snacks. consider using clear containers to showcase your pasta and grains,or invest in stackable bins to maximize vertical space.You can also add a small countertop for meal prep or a coffee station, further enhancing the utility of this newly converted space.
To ensure that your pantry is effortlessly organized, think about incorporating a variety of storage solutions such as lazy Susans for herbs and spices or labeled baskets for easy identification.It can be beneficial to have a small cutting board or a knife magnet on the wall inside the closet door, keeping essential tools close at hand. Additionally, consider installing adjustable shelves, allowing you to customize the height according to your needs, making everything more visible and user-pleasant. With a little creativity and planning,a closet can become the heartbeat of your kitchen,giving you the extra room to cook and entertain with ease.
Hideaway Appliances: Use appliance garages to keep your small appliances like toasters and blenders hidden yet conveniently accessible
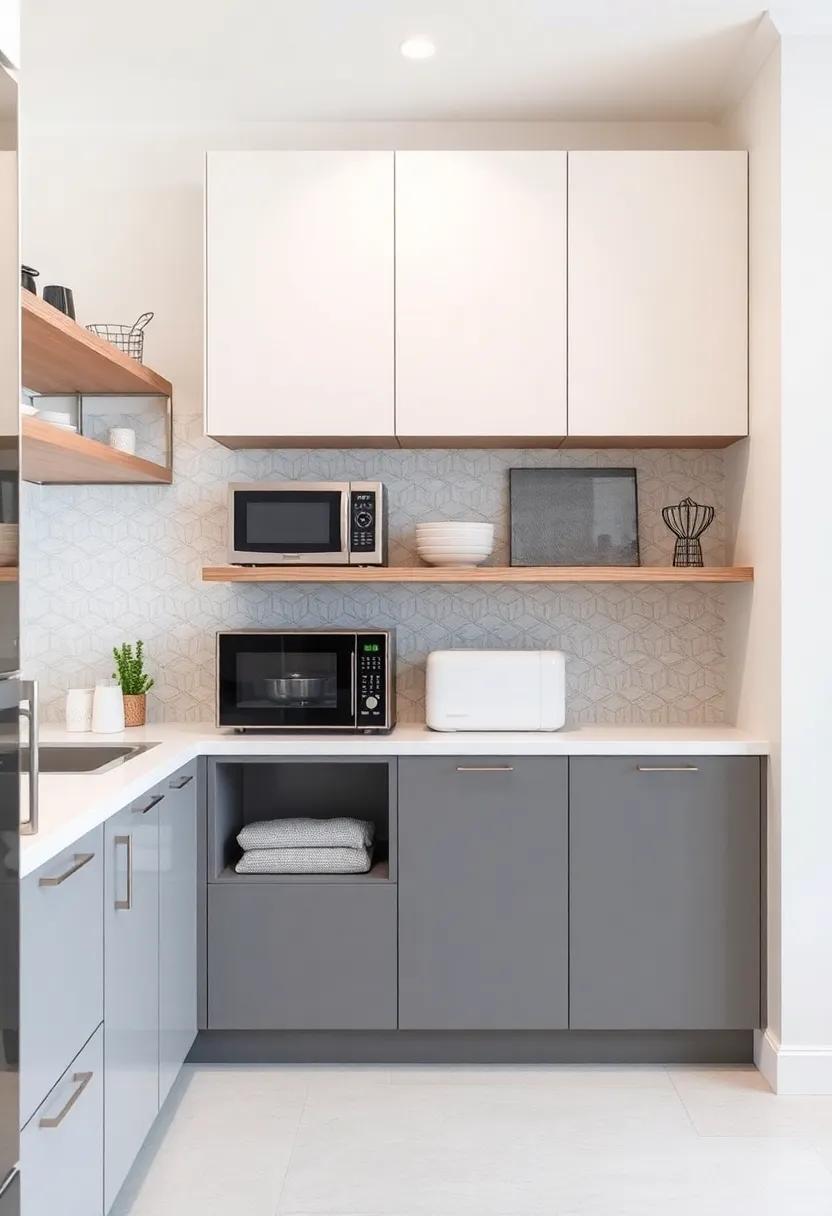
In a compact L-shaped kitchen, maintaining an organized and clutter-free countertop can make all the difference in your cooking experience. One clever solution is the incorporation of appliance garages. These specialized storage units allow you to conceal small appliances like toasters, blenders, and coffee makers within easy reach, creating a sleek and tidy look. You can choose to have these garages with a lift-up door or a pull-down shade, providing style alongside functionality. Not only do they hide the appliances when not in use, but they also keep cords tucked away, ensuring safety and reducing visual clutter.
To maximize this clever configuration, consider the following tips when designing your appliance garage:
- Group Similar Appliances: Store like items together, such as all breakfast-making tools (toaster, coffee maker) in one section.
- Design for Accessibility: Ensure your garage is located at a height that allows easy access to items without straining or bending.
- Utilize Vertical Space: Install shelves within the garage for additional items or accessories, like measuring cups or snack containers.
| Appliance | Ideal Storage Location | Usage frequency |
|---|---|---|
| Toaster | Top shelf of appliance garage | Daily |
| Blender | Middle shelf of appliance garage | Weekly |
| Coffee Maker | Bottom shelf of appliance garage | Daily |
Rolling Carts: Incorporate a rolling cart that can be moved as needed for additional prep space or serving area when entertaining guests
One clever way to enhance your kitchen’s functionality is by introducing a rolling cart. This versatile piece of furniture not only adds an extra layer of prep space but can also serve as a stylish serving area when you’re hosting friends and family.Look for a cart with a combination of open shelving and drawers to maximize storage while keeping your essentials within easy reach. A few design ideas to consider include:
- Wooden Cart: Adds warmth and rustic charm to your space.
- Metal Cart: Offers a sleek, modern look and durability.
- Multi-tiered Cart: Provides ample space for dishes, utensils, and ingredients.
- Cart with Wheels: Ensures mobility,adapting to your needs effortlessly.
When not in use, a rolling cart can simply be tucked away against a wall or in a corner, freeing up precious floor space. To make it even more functional, consider outfitting it with some creative accessories.Here’s a handy table showcasing practical accessories for your rolling cart:
| Accessory | Function |
|---|---|
| Cutting Board | Ideal for quick prep and saves counter space. |
| Wine Rack | A stylish way to store and display your favorite bottles. |
| Baskets | Perfect for organizing smaller items like fruits or spices. |
| Utensil Holder | Keeps essential tools within arm’s reach. |
Creative Lighting: Use under-cabinet lighting to brighten the workspace, making the kitchen feel larger and more inviting
Transforming your kitchen into a bright and inviting workspace can be as simple as installing under-cabinet lighting. This frequently enough-overlooked feature can create a cozy atmosphere while enhancing functionality. It’s the perfect way to illuminate your countertops, making food prep easier and more enjoyable. imagine chopping vegetables under a soft, warm glow or creating a delightful ambiance for casual dining. With the right lighting, you can effectively maximize space visually, making your kitchen appear larger and more open.
When selecting under-cabinet lighting, consider the following options to suit your style and needs:
- LED Strip Lights: Flexible and customizable, these lights can be cut to size and installed easily.
- Puck Lights: Compact and bright, perfect for targeted illumination in smaller areas.
- Rope Lights: Great for creating a soft glow, adding a touch of elegance.
- Hardwired fixtures: A more permanent solution that offers a polished look, ideal for those renovating.
To further enhance your under-cabinet lighting system, consider creating a simple lighting schedule that activates your fixtures at specific times. Check out this handy table to see potential options:
| Lighting Option | Brightness Level (Lumens) | Recommended Type of Light |
|---|---|---|
| LED Strip Lights | 300-900 | Warm White |
| Puck Lights | 100-300 | Cool White |
| Rope Lights | 200-600 | Soft White |
| Hardwired Fixtures | 400-800 | Daylight |
Utilizing under-cabinet lighting not only brightens your workspace but also accentuates the beauty of your kitchen design. when done thoughtfully, these illuminating upgrades can elevate your cooking experience, transforming your small L-shaped kitchen into a culinary oasis that feels expansive and welcoming.
Extending Countertops: Add a small overhang to your countertops to create a breakfast bar or additional counter space without major renovations
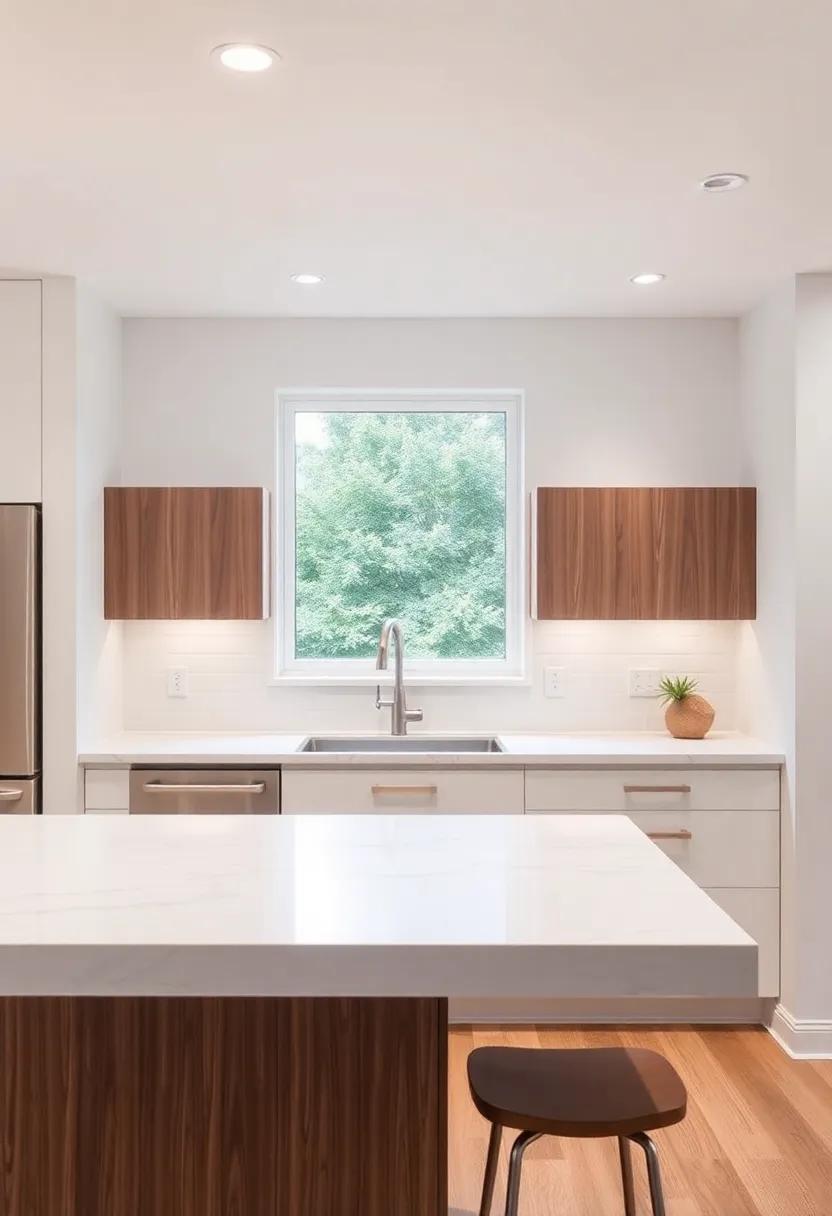
One of the simplest yet most effective ways to enhance the functionality of your small L-shaped kitchen is by incorporating a small overhang on your existing countertops. This minimal modification creates a casual breakfast bar perfect for quick meals, drinks, or even casual conversations while cooking. By utilizing an overhang, you can transform your regular countertop into an inviting space that encourages social interaction without the need for extensive renovations. Consider adding a few stylish bar stools to further enhance this cozy nook.
Not only does this extension provide additional surface area for dining or food prep, but it can also serve multiple purposes in your kitchen. Here are some innovative ideas to consider:
- Extra Storage: Use the space underneath for baskets or shelves to house kitchen essentials or dining ware.
- Decorative Touch: Add potted plants or decorative items on the ledge to infuse personality into your kitchen.
- Lighting: Hang pendant lights above the overhang to create an inviting atmosphere during evenings.
To ensure that the overhang blends seamlessly with your kitchen’s aesthetic, consider utilizing materials and colors that complement your existing cabinetry and countertops. Below is a quick reference table for selecting the right material:
| Material | Pros | Cons |
|---|---|---|
| Granite | Durable, heat resistant | Heavy, requires support |
| Wood | Warm aesthetic, easy to customize | Can warp with moisture, requires maintenance |
| Laminate | Cost-effective, numerous designs | Less durable, can chip easily |
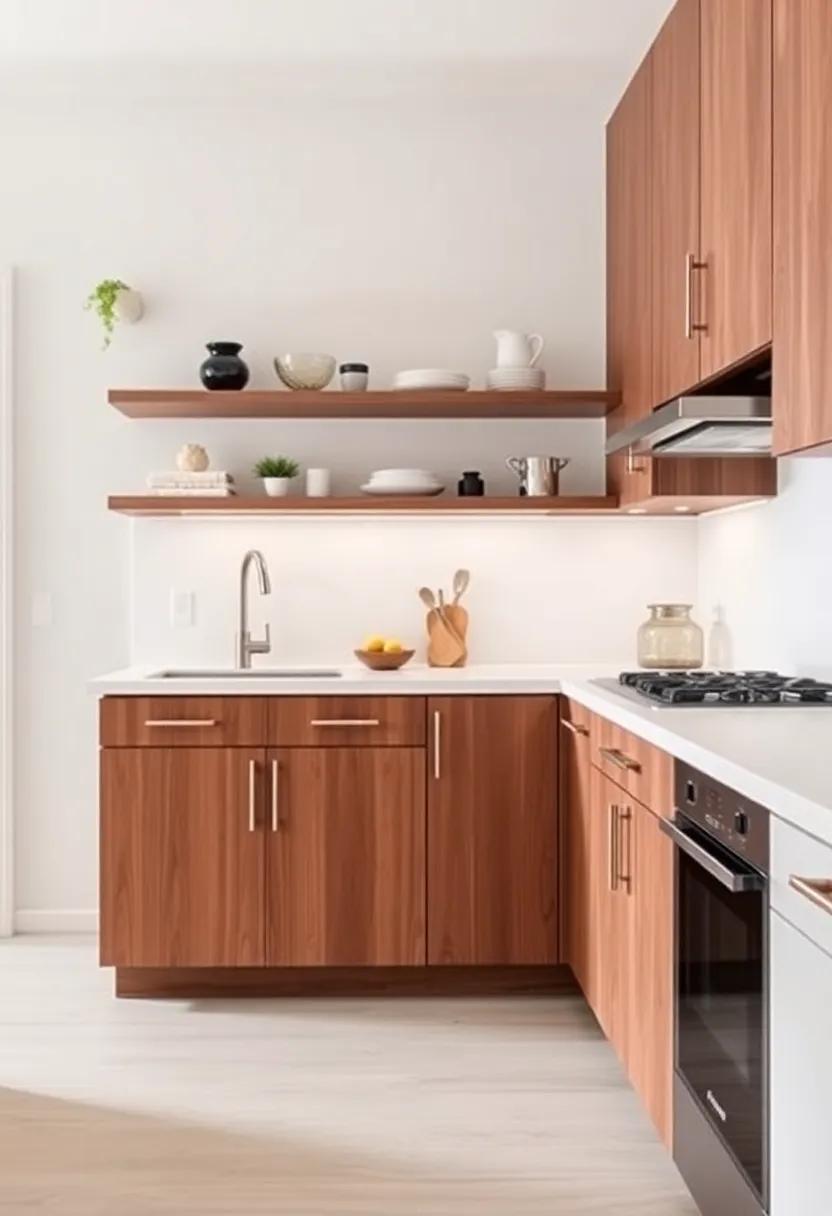
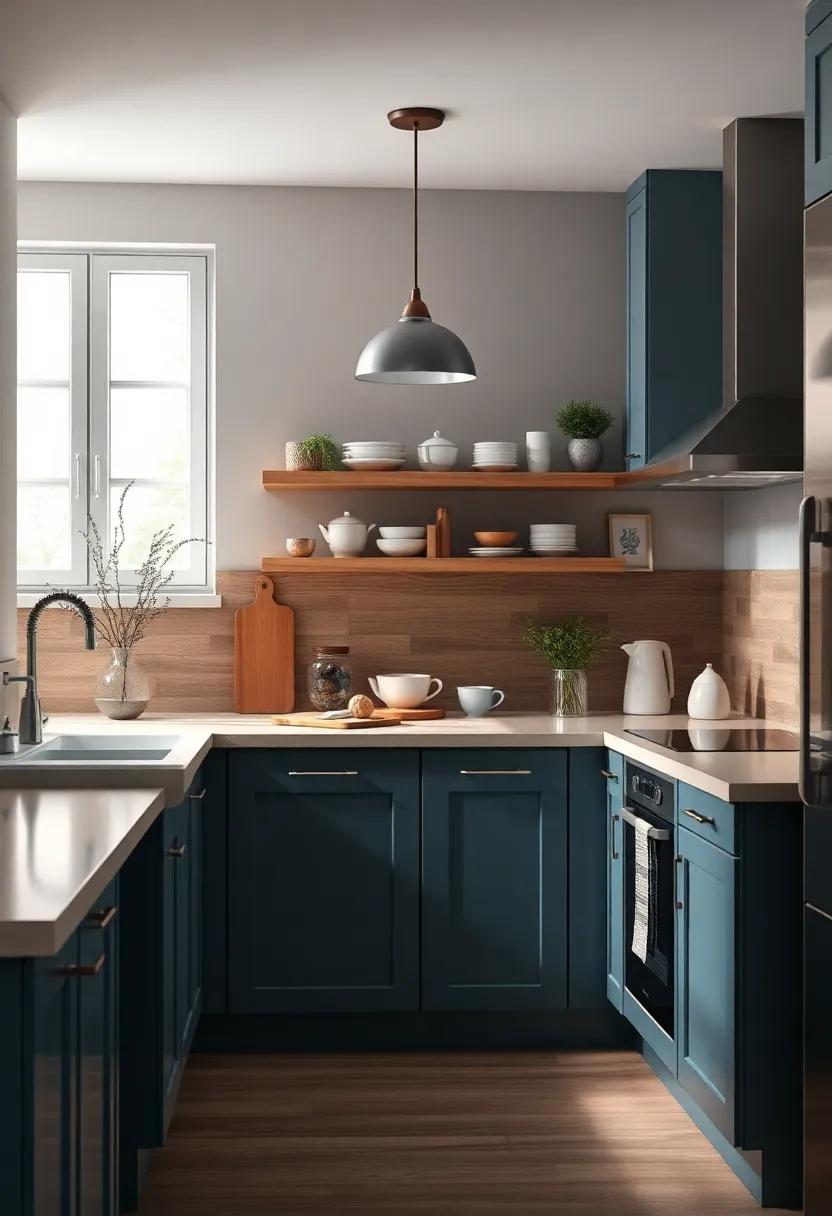
Open Shelving: Swap out some cabinets for open shelving to give the illusion of a larger space while keeping items within reach
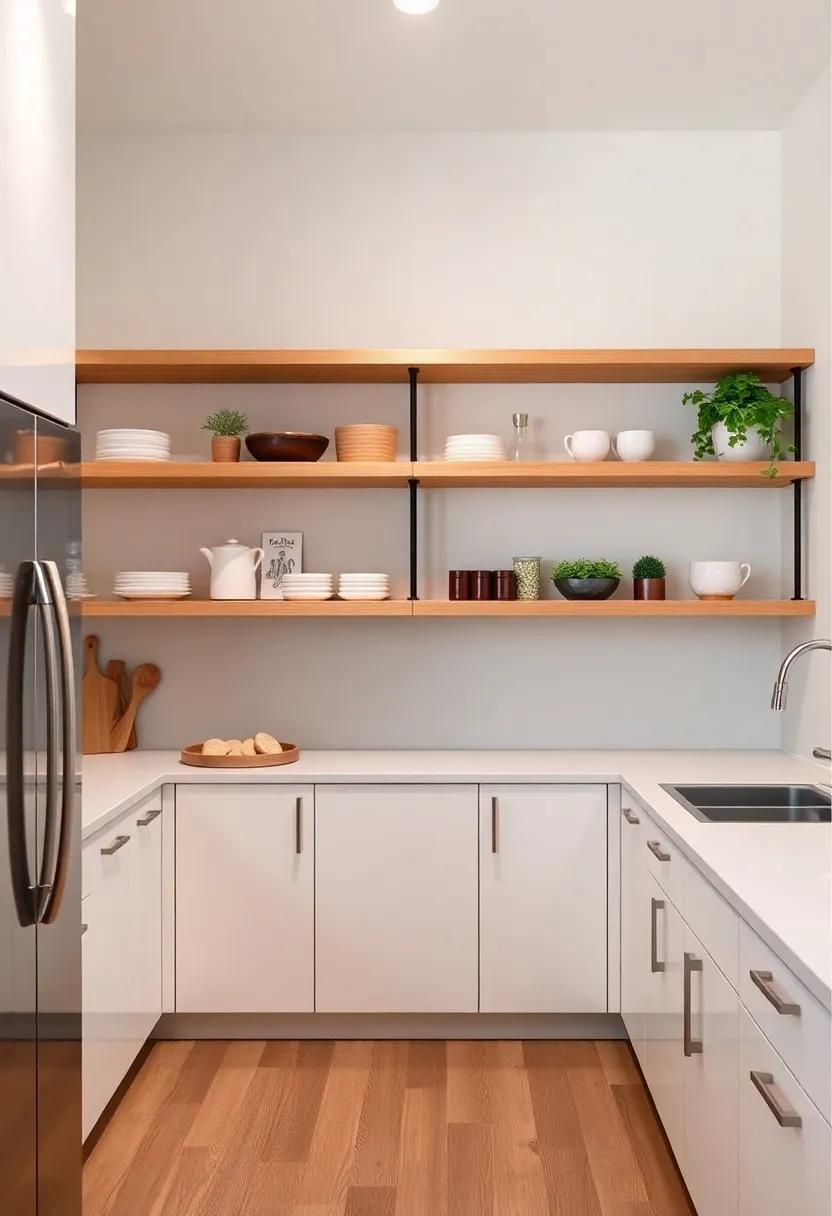
Transforming your kitchen by replacing conventional cabinets with open shelving can create a sense of spaciousness while keeping your most-used items easily accessible. This design choice not only encourages a more airy feel but also provides an chance to showcase your favorite dishware, cookbooks, and decorative pieces. Consider using floating shelves to achieve a sleek look, allowing the walls to appear less crowded. You can mix and match shelving materials such as wood or metal to coordinate with your kitchen’s style, elevating both aesthetics and functionality.
To enhance organization and maintain visual appeal, implement some strategic tips for styling your open shelves. Use baskets or small containers for storing smaller items like spices or utensils to minimize clutter, while adding depth with layered arrangements. Place heavier items on the bottom shelves for stability, while keeping lighter and more decorative pieces at eye level. Incorporating plants or small succulents can infuse life into the shelving and contribute to a welcoming atmosphere. The result is a charming, personalized space that feels much larger than its measurements suggest.
refrigerator Magnets: Use decorative magnets to adhere notes or recipes to your fridge, saving counter space for other uses
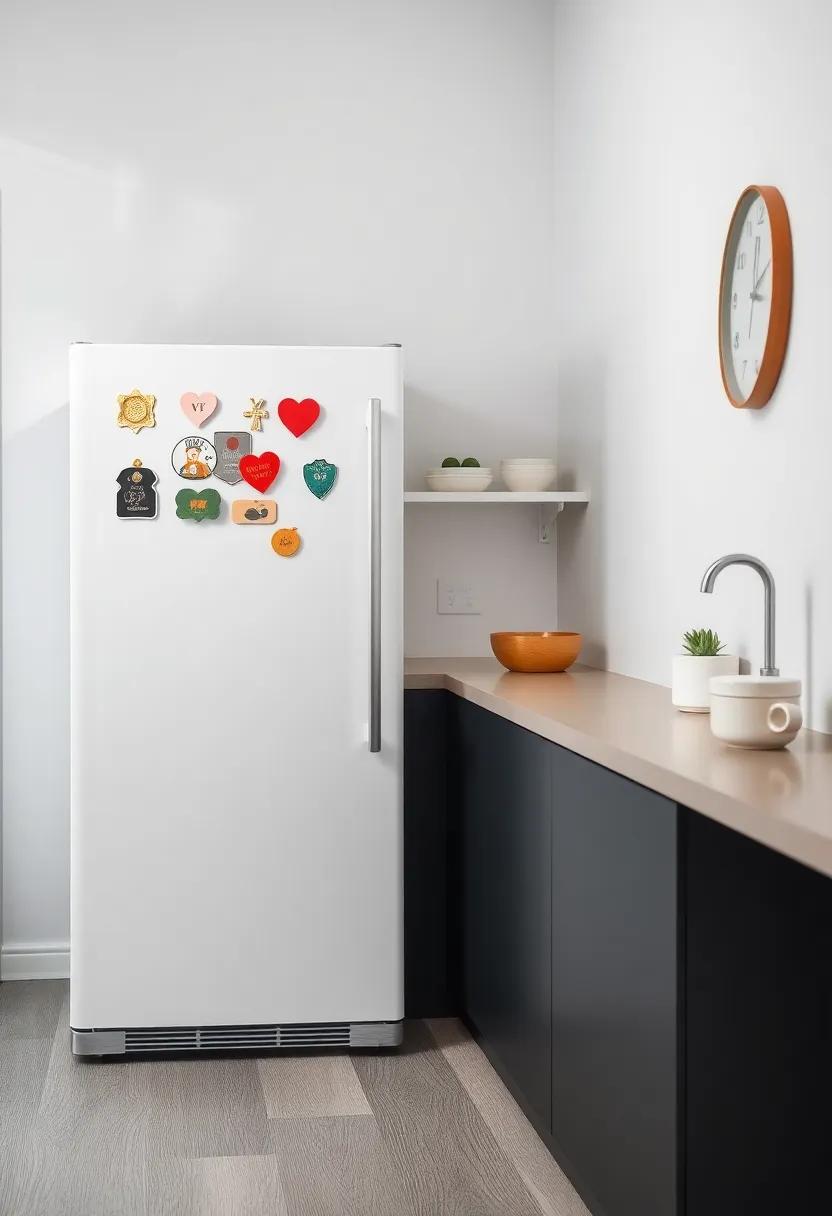
Transform your refrigerator into a canvas of inspiration and organization with decorative magnets that not only add personality to your kitchen but also serve a functional purpose. Using cute or quirky magnets, you can display family recipes, grocery lists, and important reminders. This not only keeps them in sight, making it easier to reference while cooking, but also frees up your countertop for meal prep and baking. Choose a variety of shapes and colors to create a visually appealing arrangement that reflects your style, while also ensuring that every inch of space is utilized wisely.
Consider also incorporating a few multipurpose magnetic features for added convenience. For instance, you can use magnets to hold small spice jars or even attach magnetic clips to display artwork or children’s drawings, creating a vibrant gallery. Here’s a quick table of some creative ideas:
| Magnet Type | Function |
|---|---|
| Decorative Magnets | display recipes and notes |
| Magnetic Clips | Hold artwork and reminders |
| Magnetic Spice Jars | Organize frequently used spices |
This innovative approach not only declutters your workspace but also brings a personal touch to your kitchen aesthetics. With the right selection of magnets,you can create a harmonious balance between utility and style,ensuring that your small L-shaped kitchen remains a warm and welcoming environment.
Drawer Pull-Out Trays: Upgrade drawers with pull-out trays for easy access to pots and pans at the back, maximizing usable space
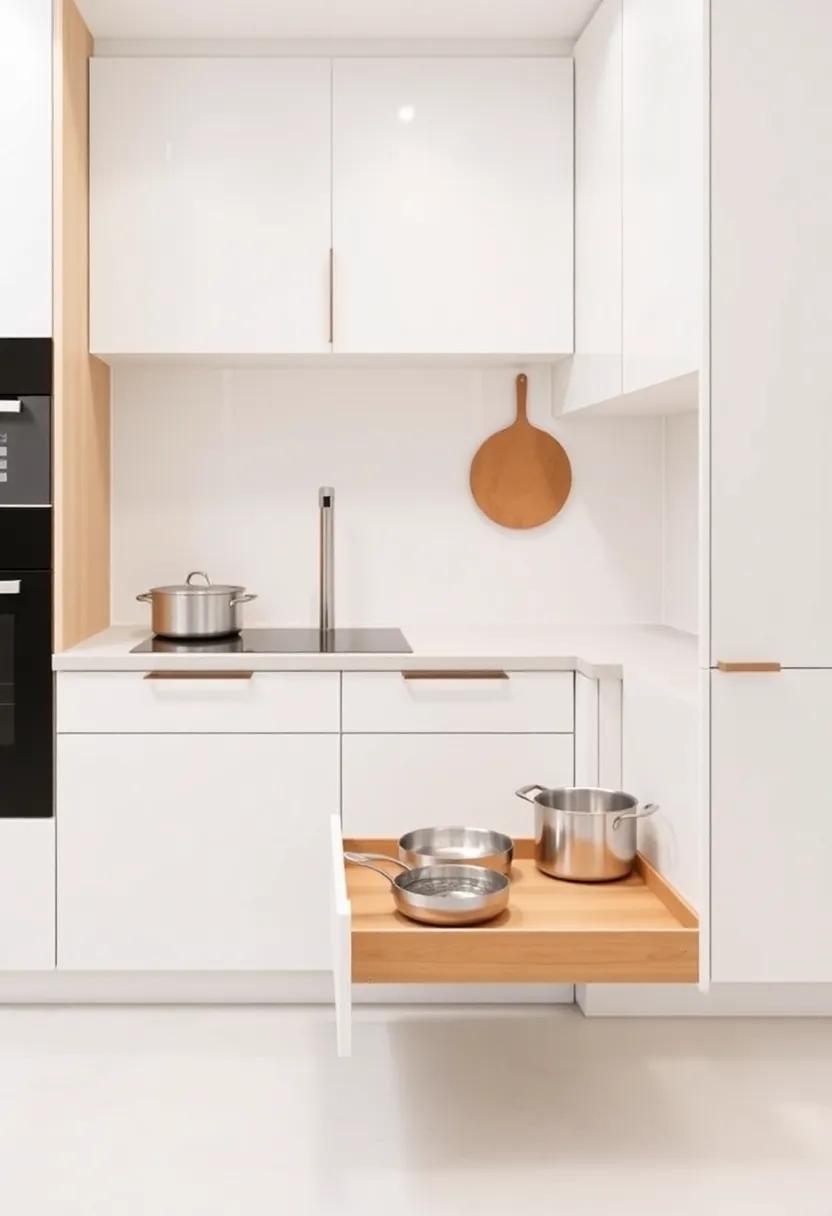
Transform your kitchen drawers from cluttered storage spaces to organized havens by incorporating pull-out trays. These convenient additions slide easily for straightforward access, eliminating the frustrating hunting around for pots and pans hidden at the back. With deep, spacious designs, pull-out trays can accommodate various cookware sizes, ensuring everything you need is in arm’s reach. Whether you’re a culinary novice or a seasoned chef, this upgrade allows you to maximize usable space while enhancing the aesthetic of your kitchen.
Consider organizing your pull-out trays with simple dividers or bins, creating designated sections that keep your kitchenware in order. the versatility of pull-out systems means you can customize the layout according to the specific items you own, from frying pans to lids. You might even want to opt for pull-out trays with soft-close features,providing not only functionality but also a touch of luxury to your cooking area. The result? A beautifully streamlined kitchen that ensures every item has its place.
| Tray Size | Best Use | Material |
|---|---|---|
| Small (18 inches) | Small pots and pans | Wood or Plastic |
| Medium (24 inches) | Medium-sized cookware | Steel or Bamboo |
| Large (36 inches) | Heavy-duty pots | Aluminum or Composite |
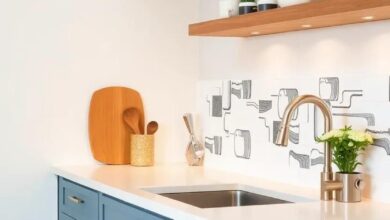
utilize Under-Cabinet Space: Add hooks or narrow shelves underneath your upper cabinets for extra storage of mugs or cookbooks
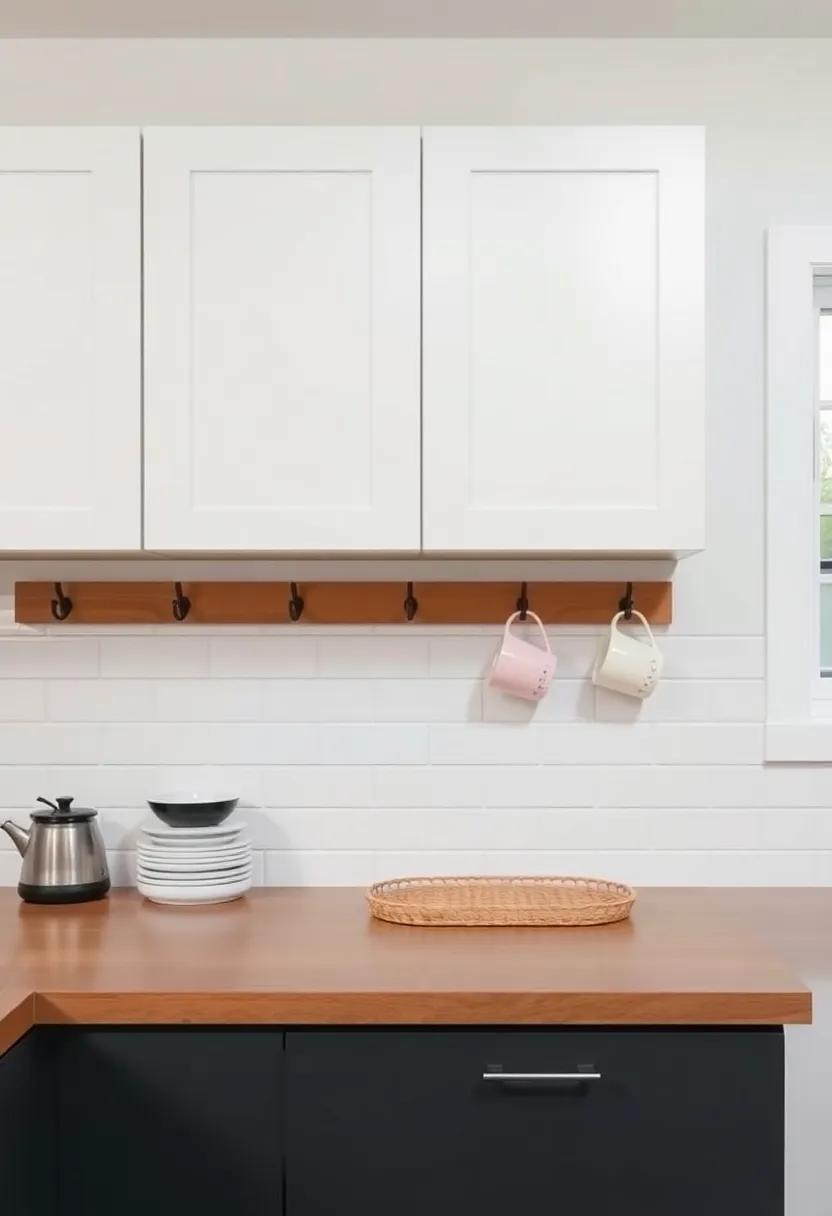
One of the easiest ways to expand your storage without sacrificing valuable counter space is to make use of the area beneath your upper cabinets. Adding hooks along the underside can create a charming display while providing functional storage for your favorite mugs. Consider:
- Colorful Mugs: Hang vibrant mugs to add a pop of color to your kitchen.
- Measuring Spoons: Easily accessible and always on hand.
- Tea Towels: Keeps them handy for quick clean-ups.
This not only keeps them organized but also showcases your personality and style.
If hooks aren’t your style, narrow shelves under the cabinets can provide a stylish solution for your cookbooks or small potted herbs.Slimline shelves can maximize vertical space and keep kitchen essentials within reach. Think about:
- Compact Cookbooks: Display your favorites for easy reference while cooking.
- Herb Planters: Fresh herbs on hand for convenient culinary use.
- Decorative Baskets: Use for streamlined storage of small items.
by strategically placing these elements, you can create a cozy and functional atmosphere that makes your small kitchen feel both inviting and efficient.
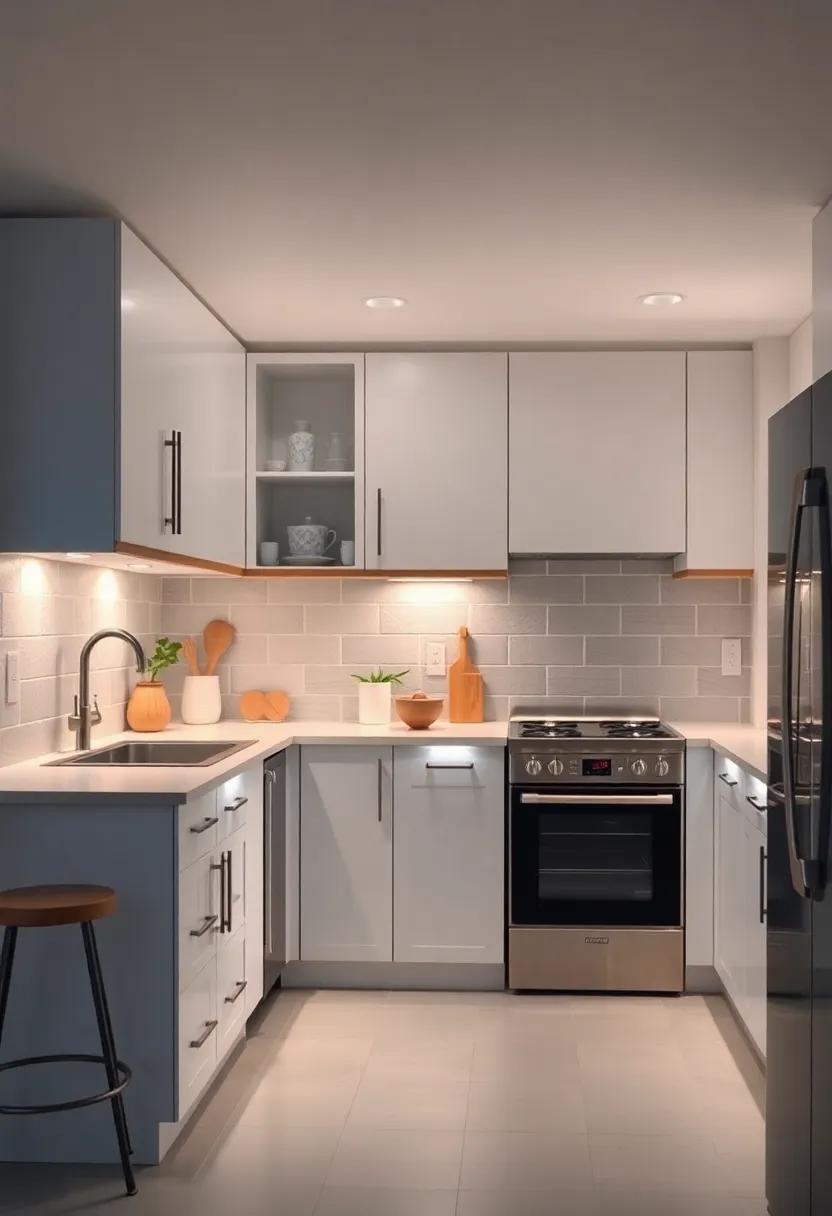
Compact Kitchen Appliances: Choose smaller, space-saving appliances designed for compact kitchens to help reduce clutter
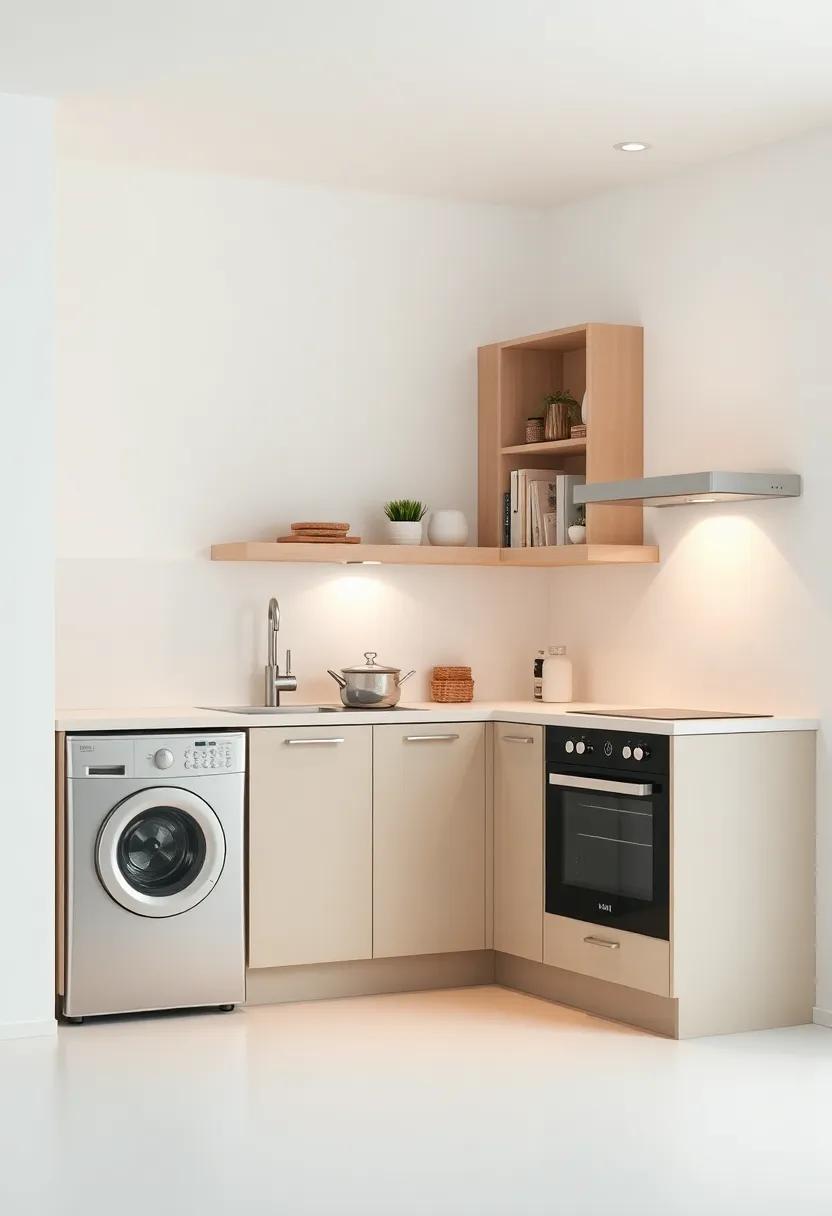
In a small L-shaped kitchen,finding the right appliances can revolutionize your cooking experience without overwhelming your limited space. Opt for compact versions of the appliances you use most, such as a mini food processor or a countertop convection oven. these smaller appliances pack a punch in functionality while maintaining a sleek profile. Consider appliances that combine multiple functions—like a blender that doubles as a food chopper or a toaster oven with air fryer capabilities—to maximize utility while minimizing foot traffic in your kitchen. Here are some excellent compact appliances to consider:
- Electric Kettle: Quick heating for tea or instant meals without taking up stove space.
- Single Serve Coffee Maker: Enjoy fresh coffee without a bulky brew station.
- Compact Dishwasher: An efficient solution for small kitchens that can’t accommodate full-size models.
- Rice Cooker: Perfectly fluffy rice in a small footprint,ideal for meal prepping.
- Induction Cooktop: Extra cooking surface that’s portable and easy to store.
When reimagining your kitchen, it’s worth exploring the market for space-saving designs that complement your decor too. Think about multi-functional appliances that enhance productivity, like a mixing bowl that doubles as a storage container. To help you decide, here’s a quick reference comparing features:
| Appliance | Functionality | Space Saving |
|---|---|---|
| Mini Food Processor | Chop, slice, and blend | Half the size of traditional models |
| Toaster Oven | Bake, broil, toast | Fits on a countertop without dominating it |
| Rice Cooker | Steams and cooks rice efficiently | Compact design for easy storage |
Rotate Stock: Regularly rotate stock in your refrigerator and pantry to keep track of items and prevent buildup of unused products
Maintaining an organized refrigerator and pantry is crucial for making the most out of your small kitchen. By regularly rotating your stock, you’ll not only keep tabs on what you have but also ensure nothing goes to waste. Start by moving older items to the front and placing new or unopened products at the back. This simple adjustment can help you utilize items before they expire, allowing for delicious meals that don’t rely on forgotten ingredients.
consider using transparent bins or pull-out drawers to categorize your items and make the rotation process more manageable. Here are some easy tips to implement this technique effectively:
- Group similar items together: Keep all condiments in one area and snacks in another.
- Date labels: Use a label maker to note dates on jars and containers, making it simple to identify what needs to be used first.
- Weekly inventory checks: Set aside a few minutes each week to assess what needs to be consumed and what’s about to expire.
| Item Type | Recommended Rotation Frequency |
|---|---|
| Condiments | Every 2 months |
| Canned Goods | Every 6 months |
| Frozen Produce | Every 3 months |
| Spices | Every year |
Personal Touches: Decorate with personal items that reflect your style,creating visual interest and making your L-shaped kitchen feel more spacious and inviting
Inject your personality into your L-shaped kitchen by incorporating decorative items that resonate with your style. This not only elevates the ambiance but also contributes to the feeling of spaciousness.Consider displaying family photos in stylish frames or selecting eye-catching artwork that complements your kitchen’s color palette. A small gallery wall can become a delightful focal point, pulling the eye upwards and creating the illusion of height. You can also play with textures—a woven basket or a rustic wooden bowl can add depth, drawing attention away from cramped corners while emphasizing a curated aesthetic.
Integrating personal touches goes beyond just art and photos; think about functional decor that supports your cooking needs.Hanging a selection of vintage kitchen tools or an assortment of colorful mugs can add charm while keeping your kitchen organized. A well-placed table or shelf can serve as a staging area for your most frequented spices or cookbooks, blending utility with style. Additionally, consider using a decorative cutting board not just as a tool but as a visual element by propping it against a wall or on a countertop.These little features collectively transform your space, making it uniquely yours while fostering an inviting atmosphere.
future Outlook
As we wrap up our exploration of the 27 ingenious ideas for maximizing space in your small L-shaped kitchen, we hope you’ve found inspiration to transform your culinary corner into a functional oasis. Remember, every inch counts in a compact space, and with a little creativity and thoughtful planning, you can elevate both style and efficiency. Whether you choose to invest in multi-functional furniture or embrace clever storage solutions, the key lies in making your kitchen work for you.So go ahead, roll up your sleeves, and start implementing these ideas. Your dream kitchen, no matter the size, is within reach. Happy cooking and designing!
As an Amazon Associate I earn from qualifying purchases.